Rigging Mode Guide
The Rigging Mode in UModeler X is a mode where you can add, edit, and skin bones for animation.
The Rigging Mode in UModeler X is a mode where you can add, edit, and skin bones for animation. In this mode, you can assign weights to vertices and implement the model's movement through weight editing.
What is Rigging?
Rigging is the process of creating a skeleton (bones) for a 3D model and setting how the model deforms according to the movement of the skeleton. In this process, the concept of Weights is used, which determines how much of the bone's movement is reflected and applied to the vertices.
In a nutshell, rigging is the process of creating a skeleton that enables animation for a 3D model and connecting the vertices to move together based on weight values when the skeleton moves.
Why is rigging necessary?
Without rigging, a 3D model exists only in a static, unmoving state, similar to a motionless statue.
Through rigging, characters or objects that need to move can be made flexible, allowing for the creation of animations.
Step-by-step rigging process
- Prepare a UModeler X object that has completed modeling and UV unwrapping.
- Enter Rigging Mode.
- Create bones.
- Skinning them using the weight-related tools.
- Move or animate the bones to see the results.

Below are explanations for each step.
1. Prepare a UModeler X object that has completed modeling and UV unwrapping.
Modeling and UV unwrapping are essential steps that must be completed before proceeding with rigging work. Modeling is the process of creating the shape of a 3D model, and UV unwrapping is the process needed to correctly map textures to the surface of a 3D model. Only models that have completed these two processes can undergo rigging work.
- Please check the following document for information on Modeling Mode and the UV Editor.
Modeling Mode
UV Editor
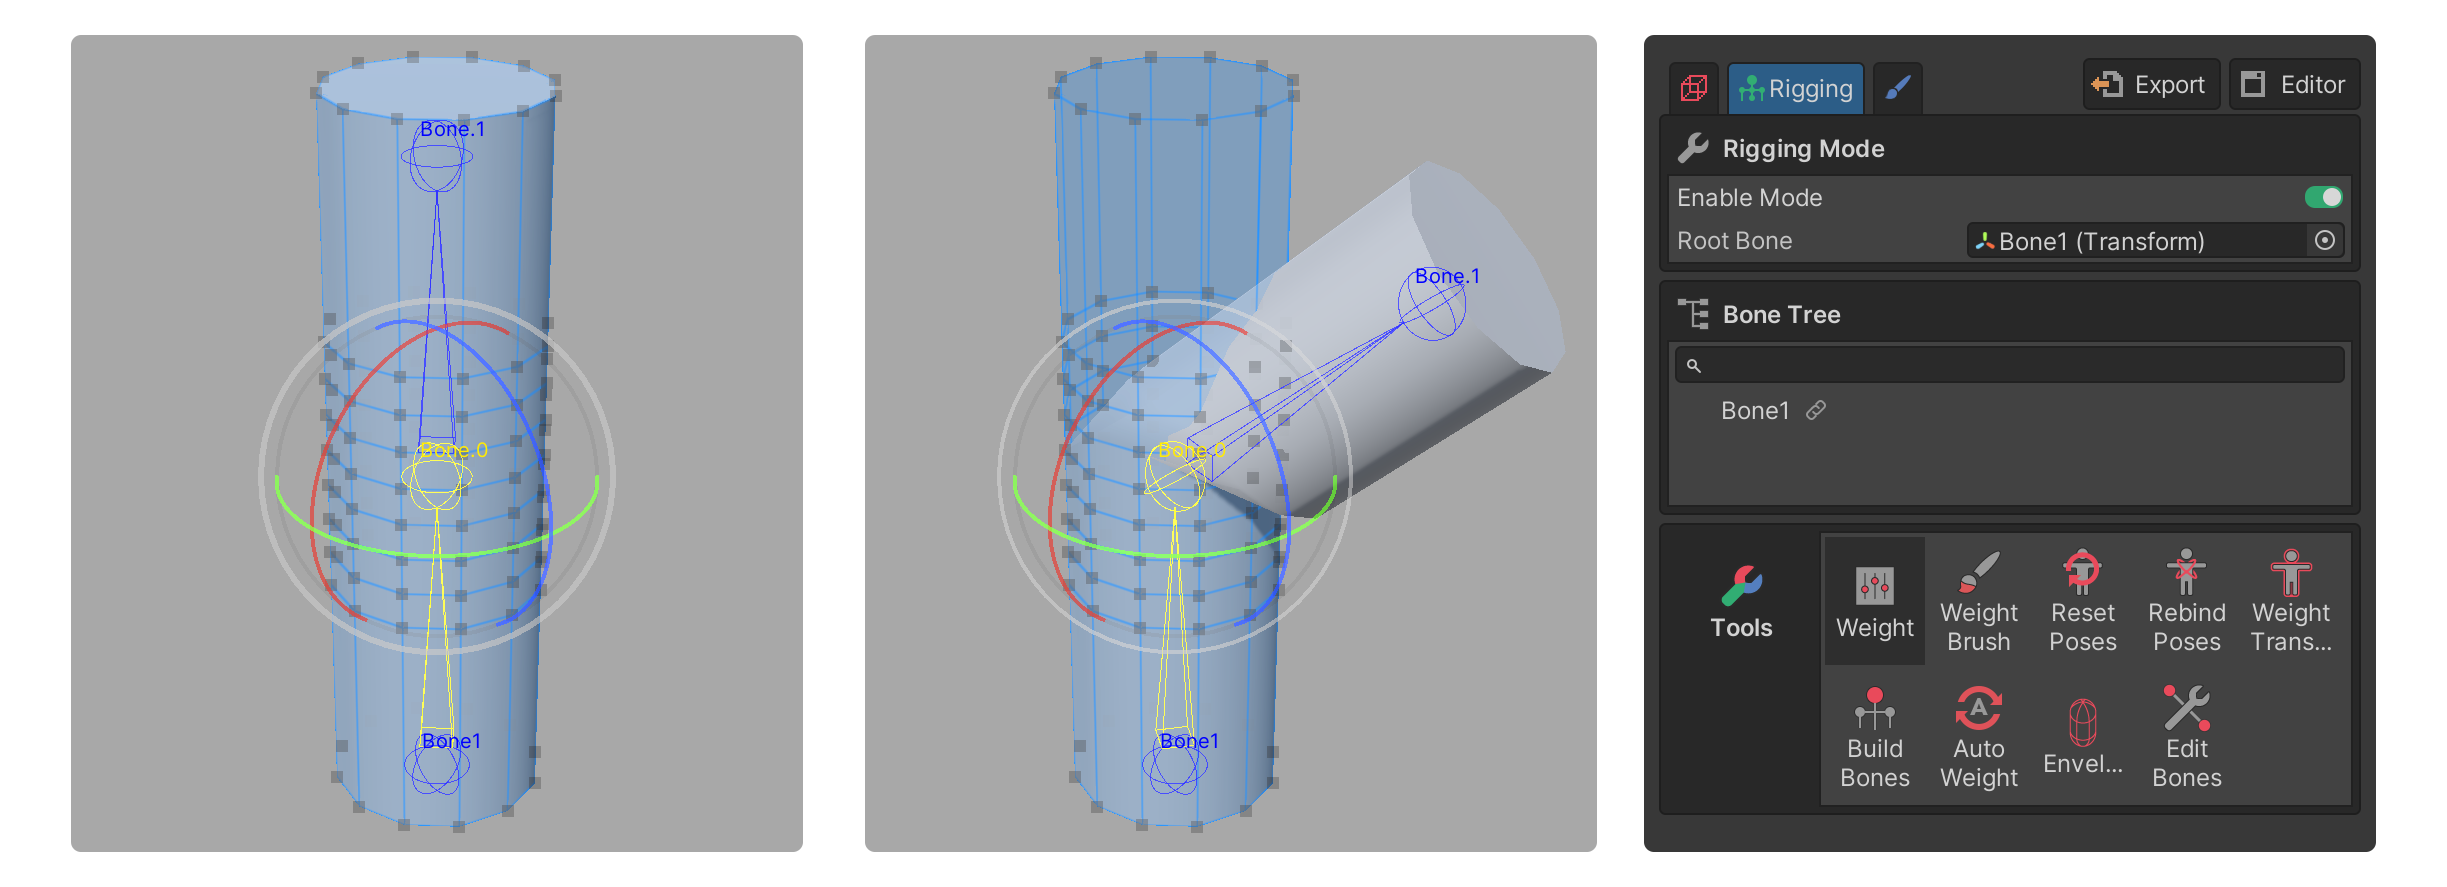
2. Enter Rigging Mode.
Once modeling and UV unwrapping are finished, you can enter Rigging Mode. Rigging Mode provides a variety of tools necessary for rig creation, weight editing, and other rigging tasks.
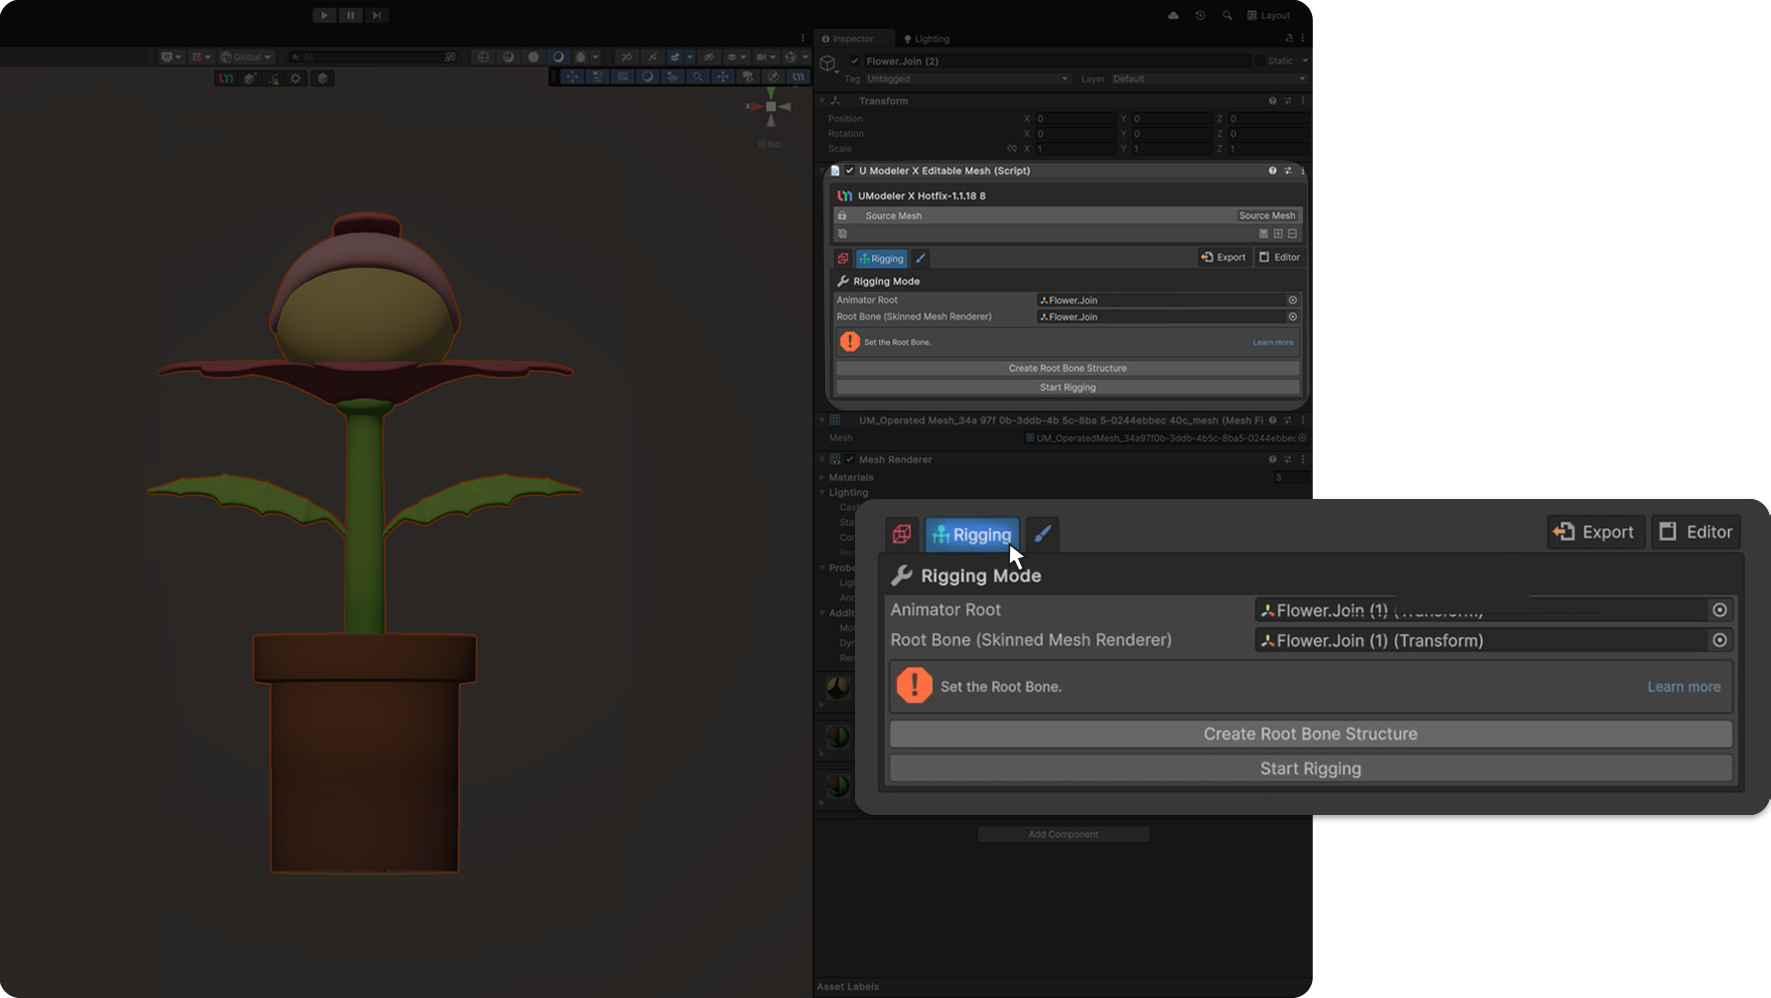
The first step is to set the Root Bone, which designates the top-level bone structure of the model.
3. Create Bones.
Bones act as the skeleton that controls the movement of a 3D model. In the process of creating bones, it is necessary to set the position of the bones and the connection structure between them.
UModeler X provides the Build Bones tool to facilitate this process easily. Using this tool, you can quickly construct the desired connection structure of the bones.
Additionally, it offers the Edit Bones tool, which allows for modifications such as editing or adding to already created bones.
4. Proceed with Skinning
Skinning is the process of linking bones to vertices. During this process, weights are assigned to each vertex to determine how much a bone's movement will affect that vertex.
- The weight editing tool can be used to perform this process. The tools available for editing weights are as follows:
- Tools that allow for the automatic or quick and convenient assignment of weights are as follows:
5. Checking the Results
The final step in the rigging process is to move the bones or apply animation to check the results. At this stage, you can verify whether the rigging work has been performed correctly and whether the desired movements have been implemented successfully.
If the desired results are not achieved, you can modify the structure of the bones or the weights to obtain the desired outcome.