
Painting Mode Guide
Entry, auto-setup, inspector layout, and end-to-end workflow for the Painting 3D Editor.
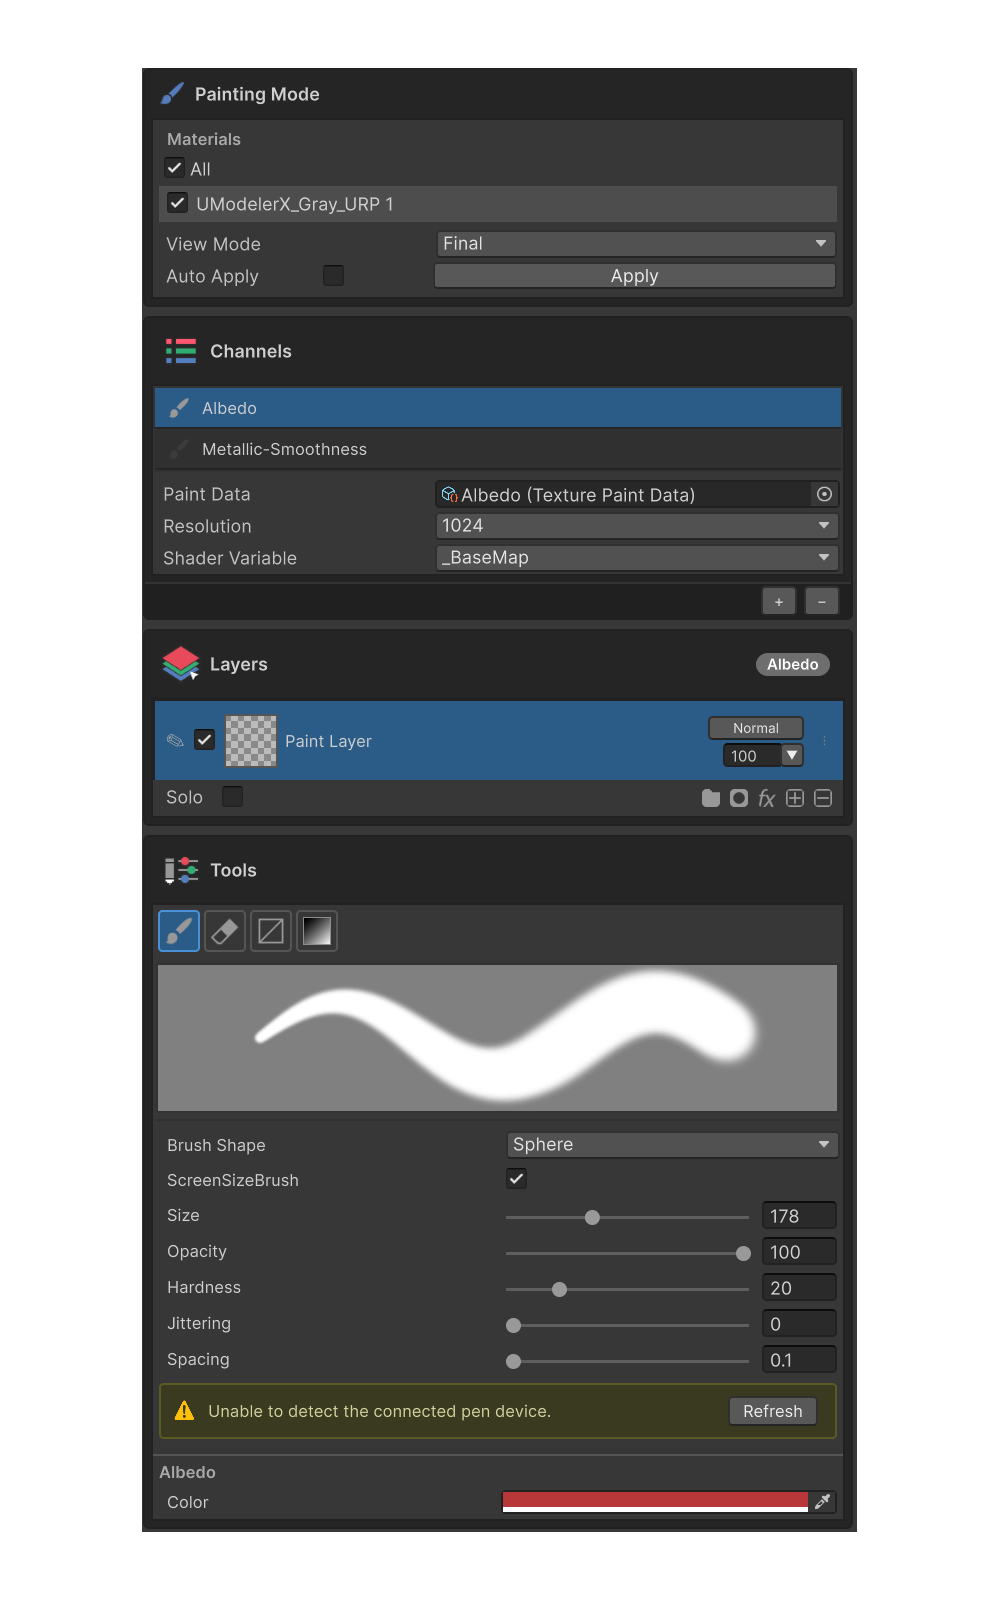
UModeler X's painting mode gives you a near-complete painting experience — brush controls, layered editing, masks, and effects — directly inside Unity. Paint on the 3D model and see the result in real time; finish your textures without leaving the editor.
Highlights
Non-Destructive Layer Editing
Build up your image layer by layer, like sketch-and-paint. Each layer is edited independently and composited top-down through a blend mode and opacity.
Paint · Fill · Sticker · Group · Mask Layers
Brush-driven Paint layers, fully-covering Fill layers, surface-decal Sticker layers, organizing Group layers, and Mask layers that combine with any of the above.
Per-Channel Painting
Author every channel the material supports — Albedo · Metallic · Roughness · Normal · Height · Emission · Mask — independently. Activate multiple channels at once and a single stroke paints into all of them.
Non-Destructive Effects
Attach Levels · Brightness/Contrast · Hue/Saturation/Lightness · Blur · Stroke to a layer and toggle or remove them at any time.
Wintab Pen Pressure
Use a tablet for naturally expressive strokes that respond to pen pressure.
Quick Color Selection
Press Shift + Alt + Right-click to open the Quick Color Palette HUD on top of the Scene View.
Entry & Auto-Setup
As soon as a material lands in a material slot, the matching PaintData / texture / layer assets are created automatically and wired into the slot. Open the Painting 3D tab and you can start painting immediately.
Workflow
-
Prepare an editable mesh.
- Model it in modeling mode, or convert an existing mesh with UModelerize.
-
Open the Painting 3D tab.
-
Make sure the mesh is unwrapped.
- Painting only applies to faces that have UV coordinates. Unwrap them with the UV Editor's Unwrap group tools if needed.
- With Preference → Auto Unwrap Shape turned on, primitive shapes are automatically unwrapped on creation.
-
Assign a material to the slot.
- Channels and PaintData are created automatically.
-
Start painting.
- Pick a tool in the Tools section (Brush / Erase / Gradient / Rect Fill) and paint.
Inspector Layout
The painting mode inspector is composed of five sections, top to bottom.
| # | Section | Role | Page |
|---|---|---|---|
| 1 | Painting Mode | Material slot selection, View Mode, Apply | Painting Mode Group |
| 2 | Channels | Add / activate channels, resolution, multi-channel painting | Channels Group |
| 3 | Layers | Layer list, blending, masks, effect attachment | Layers Group |
| 4 | Filter | Parameter panel for the selected group or effect | Effects · Filter |
| 5 | Tools | Tool palette, brush preview, tool properties, active-channel color | Tools Group |
Click any section header to collapse / expand.
Pen Pressure
To enable pen pressure on the brush:
- Connect a tablet to the PC.
- Open Window → Package Manager.
- Select Package: Unity Registry and install Input System.
- Restart the project.
- Once a pen is detected, the Brush properties in the Tools section automatically expose Enable Size Pressure / Enable Strength Pressure.
Finishing & Applying
Painting results are reflected in the material slot automatically.
- With Auto Apply enabled, the PNG is written to disk when you leave painting mode or save the scene.
- Press the Apply button in the Painting Mode section to flush the result to disk immediately.
For the underlying data layout, see Painting Data & Channels.