Hotspot Texturing
This feature automatically places each polygon’s UV according to a predefined UV layout using the Hotspot Layout Editor.
This feature automatically places each polygon’s UV according to a predefined UV layout using the Hotspot Layout Editor.
How to Use
Here's a general process to launch the Hotspot Layout Editor:
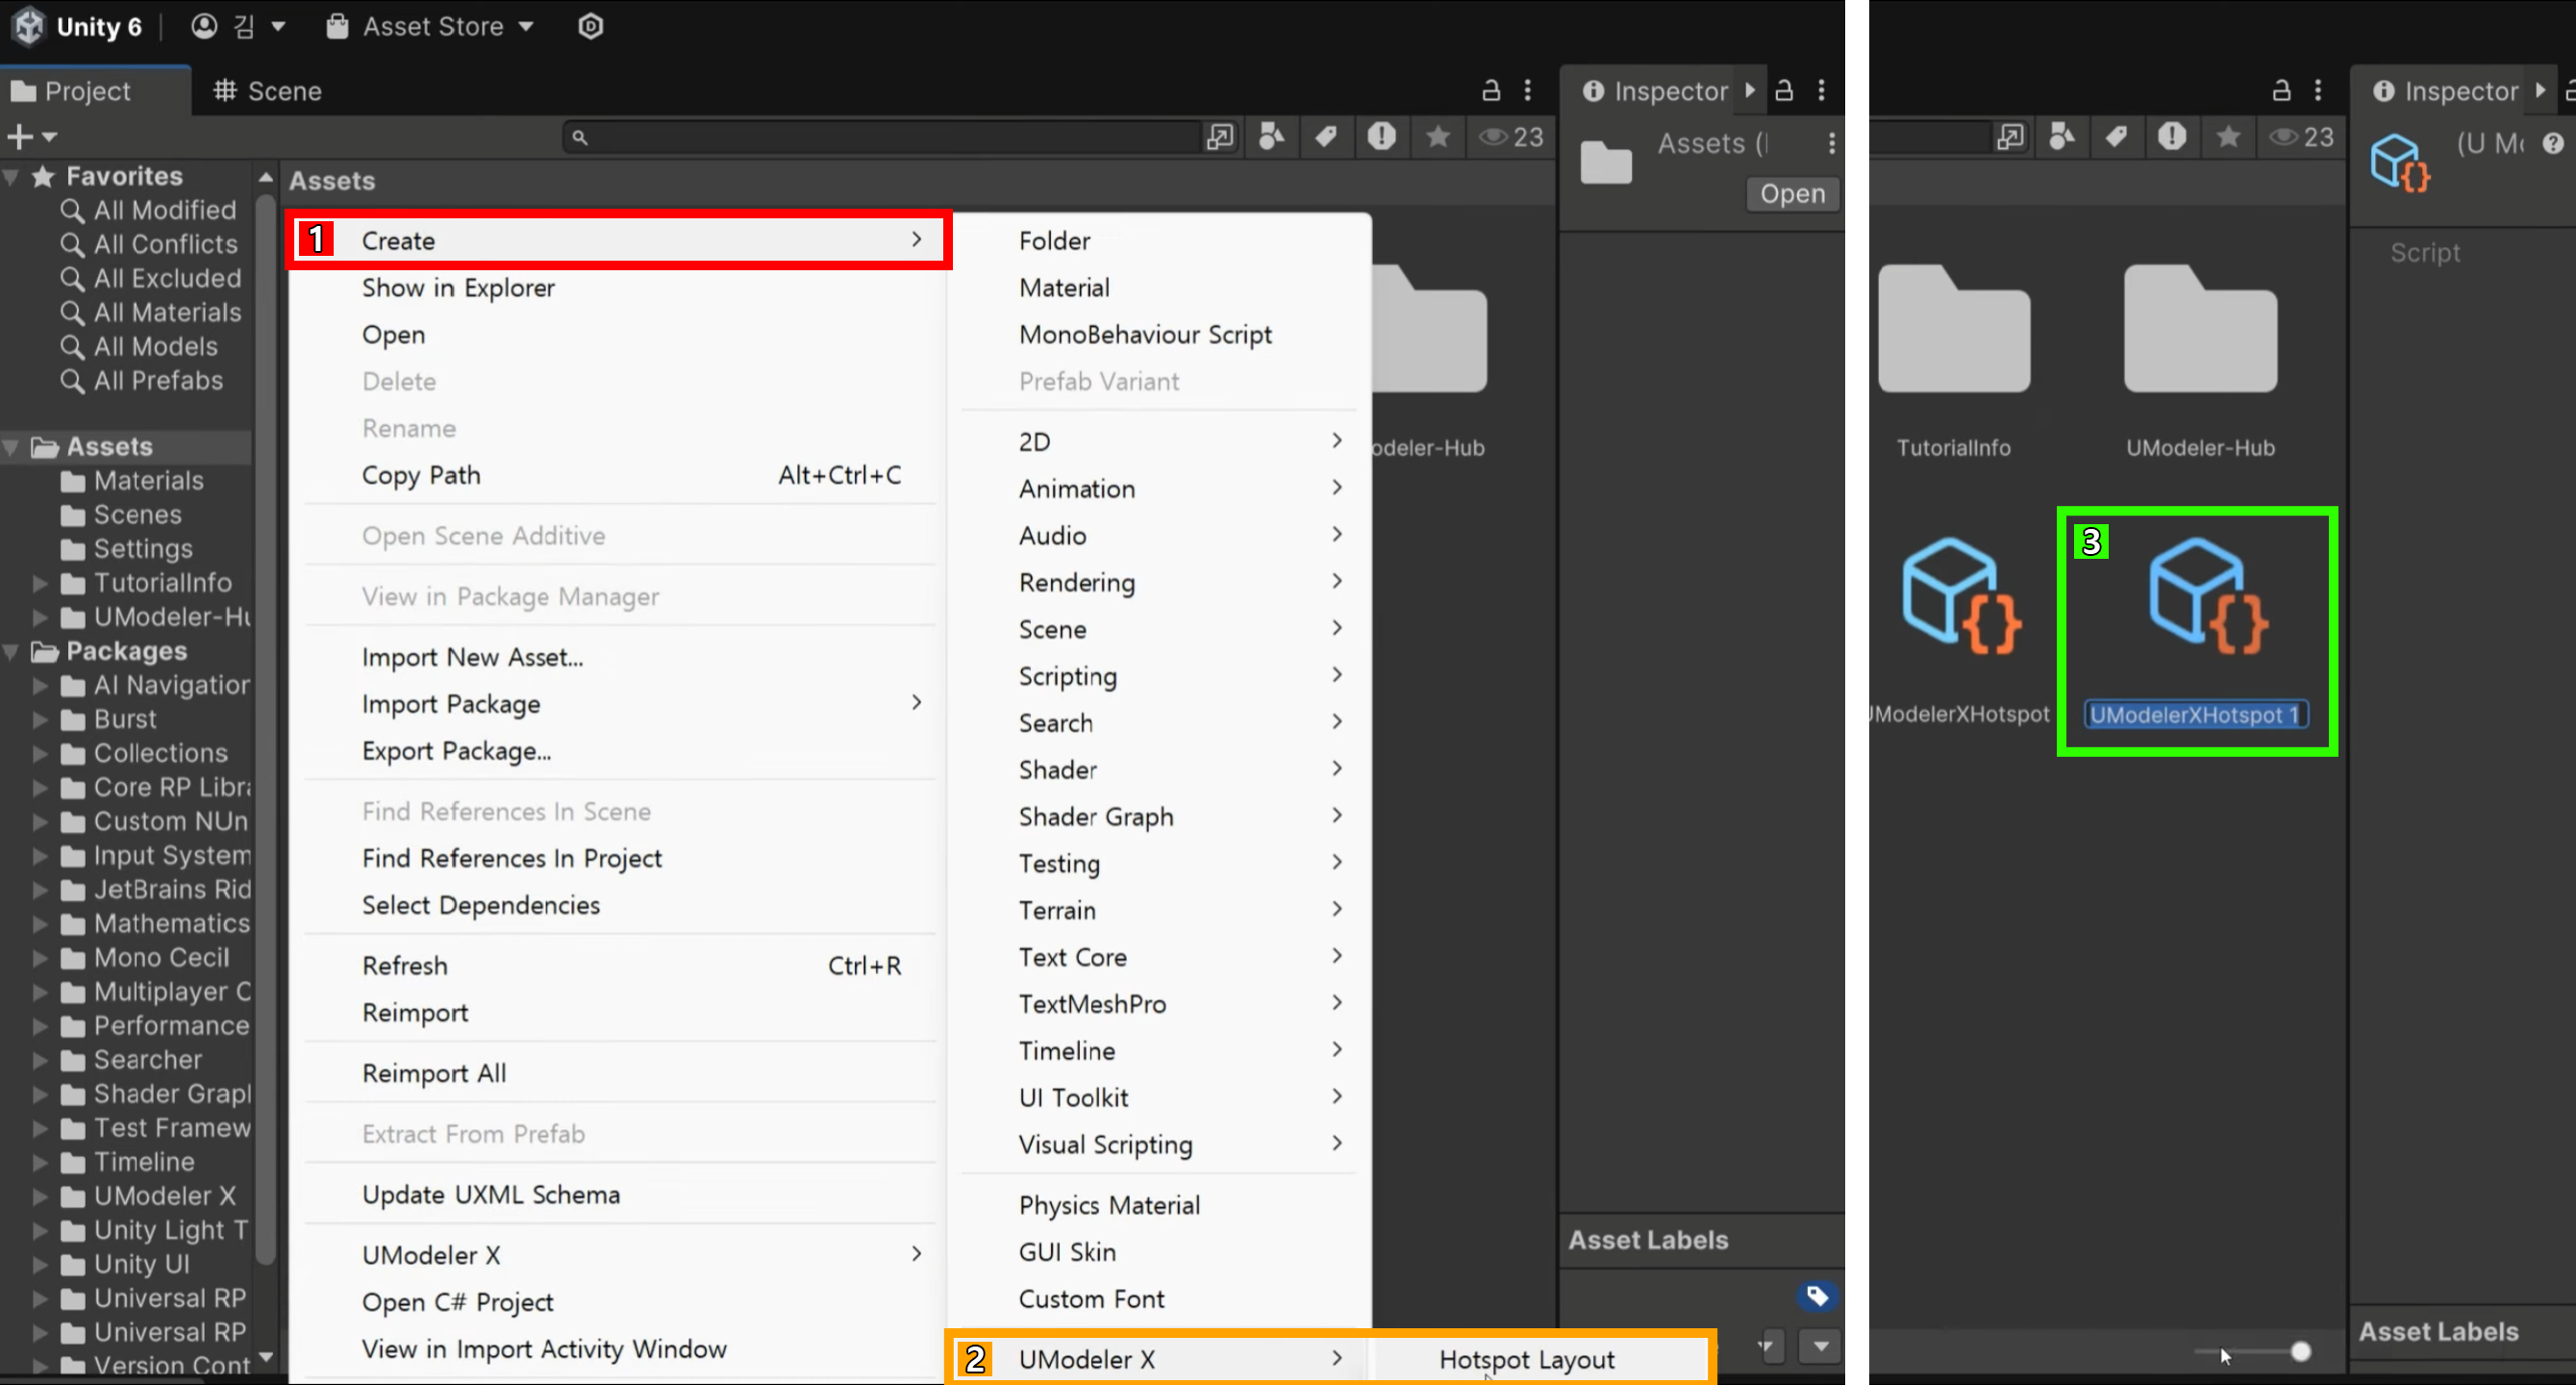
1.Right-click in the Project Panel and select UModeler X > Hotspot Layout.
2.Drag and drop the desired modular texture from the Project Panel onto the mesh.
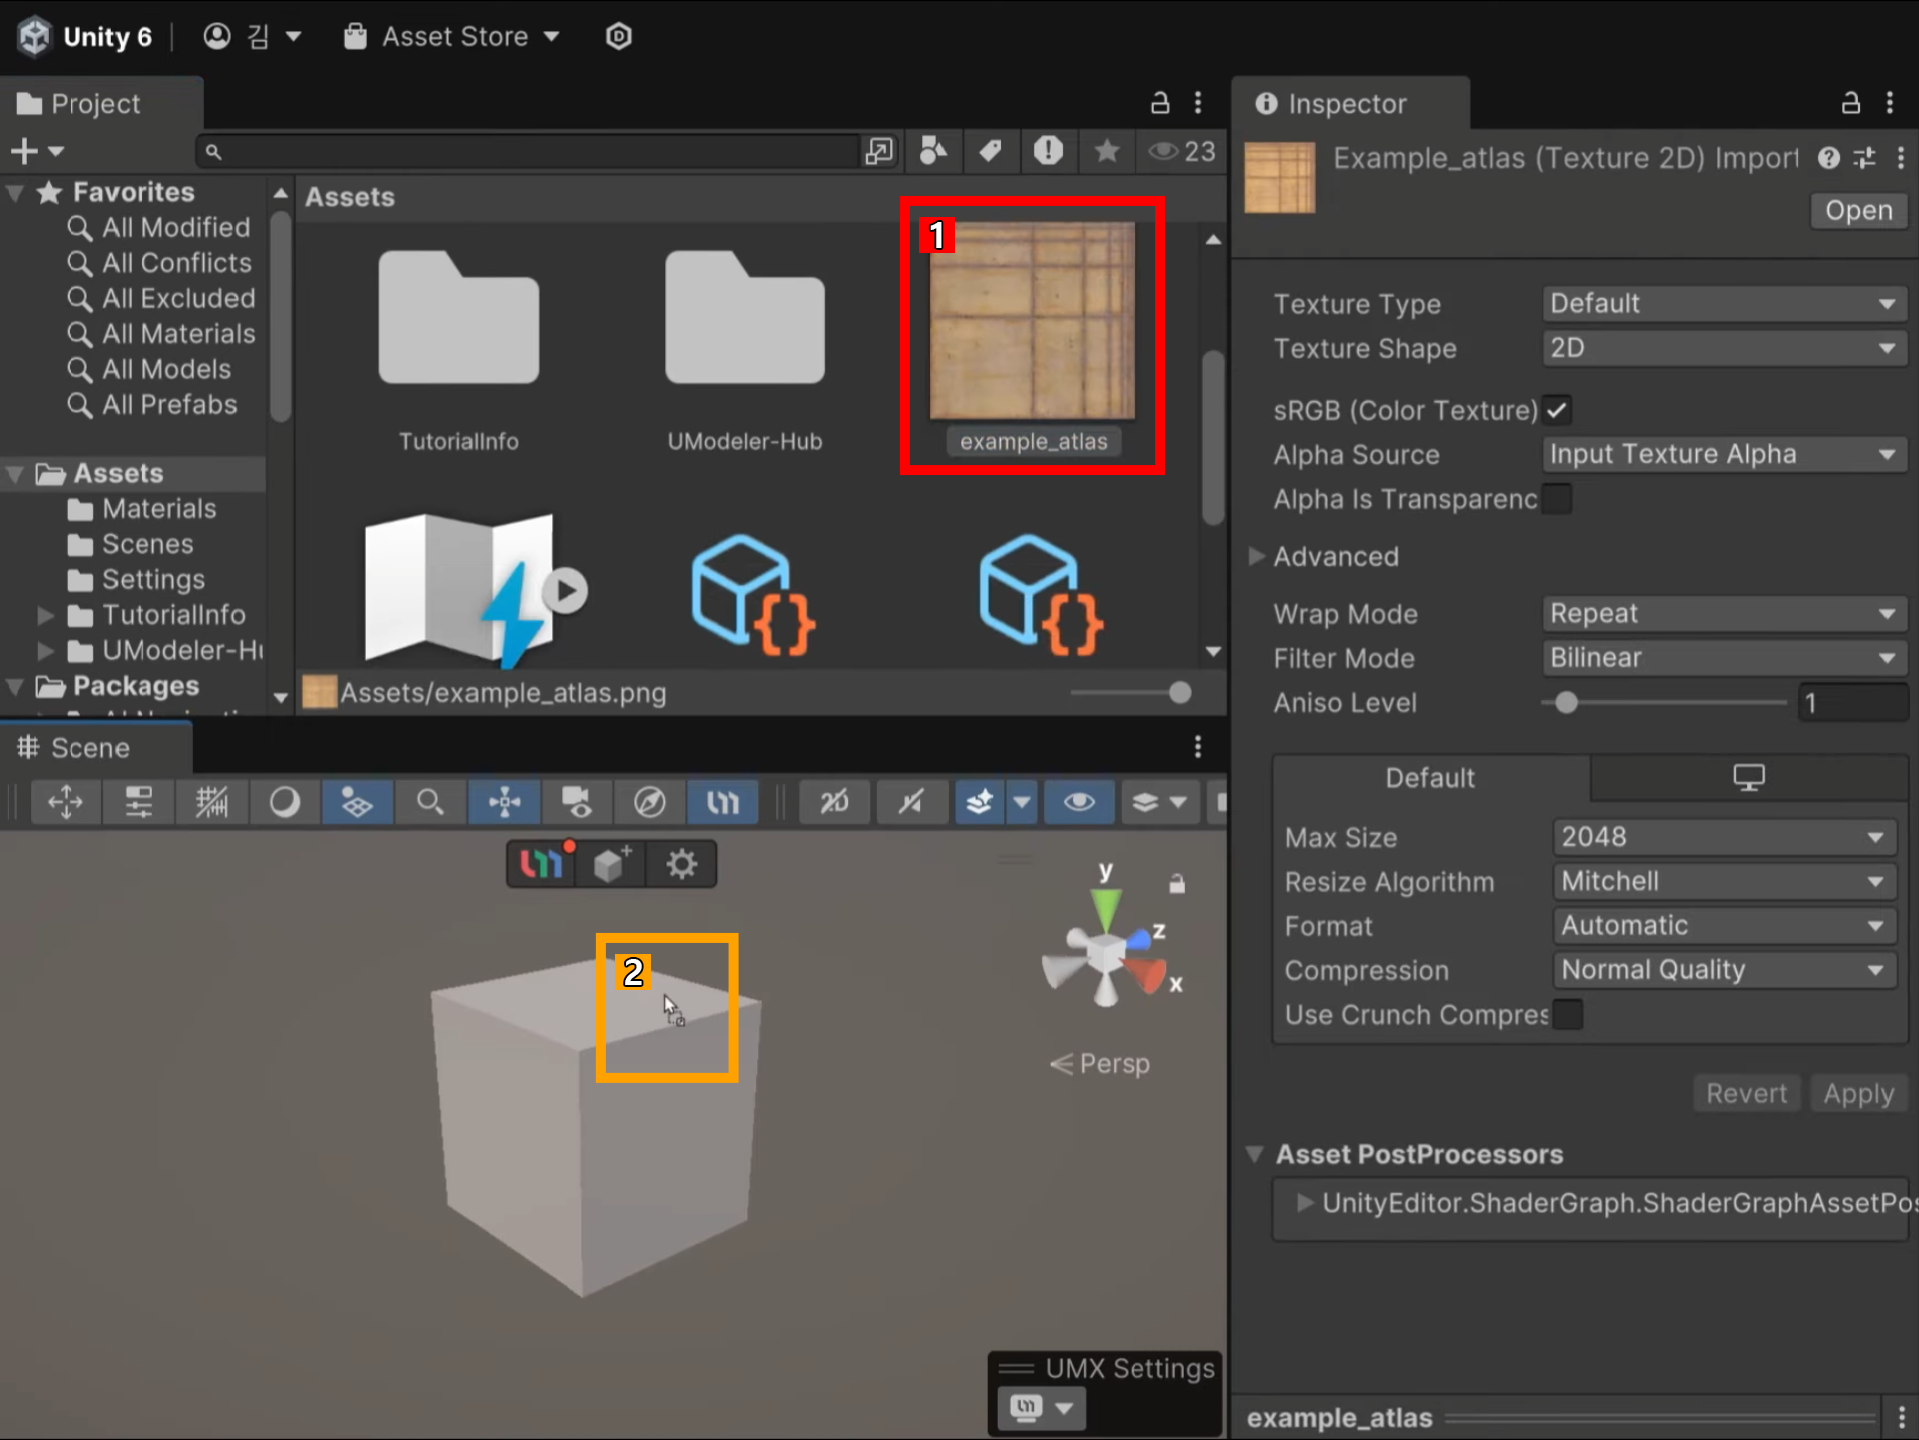
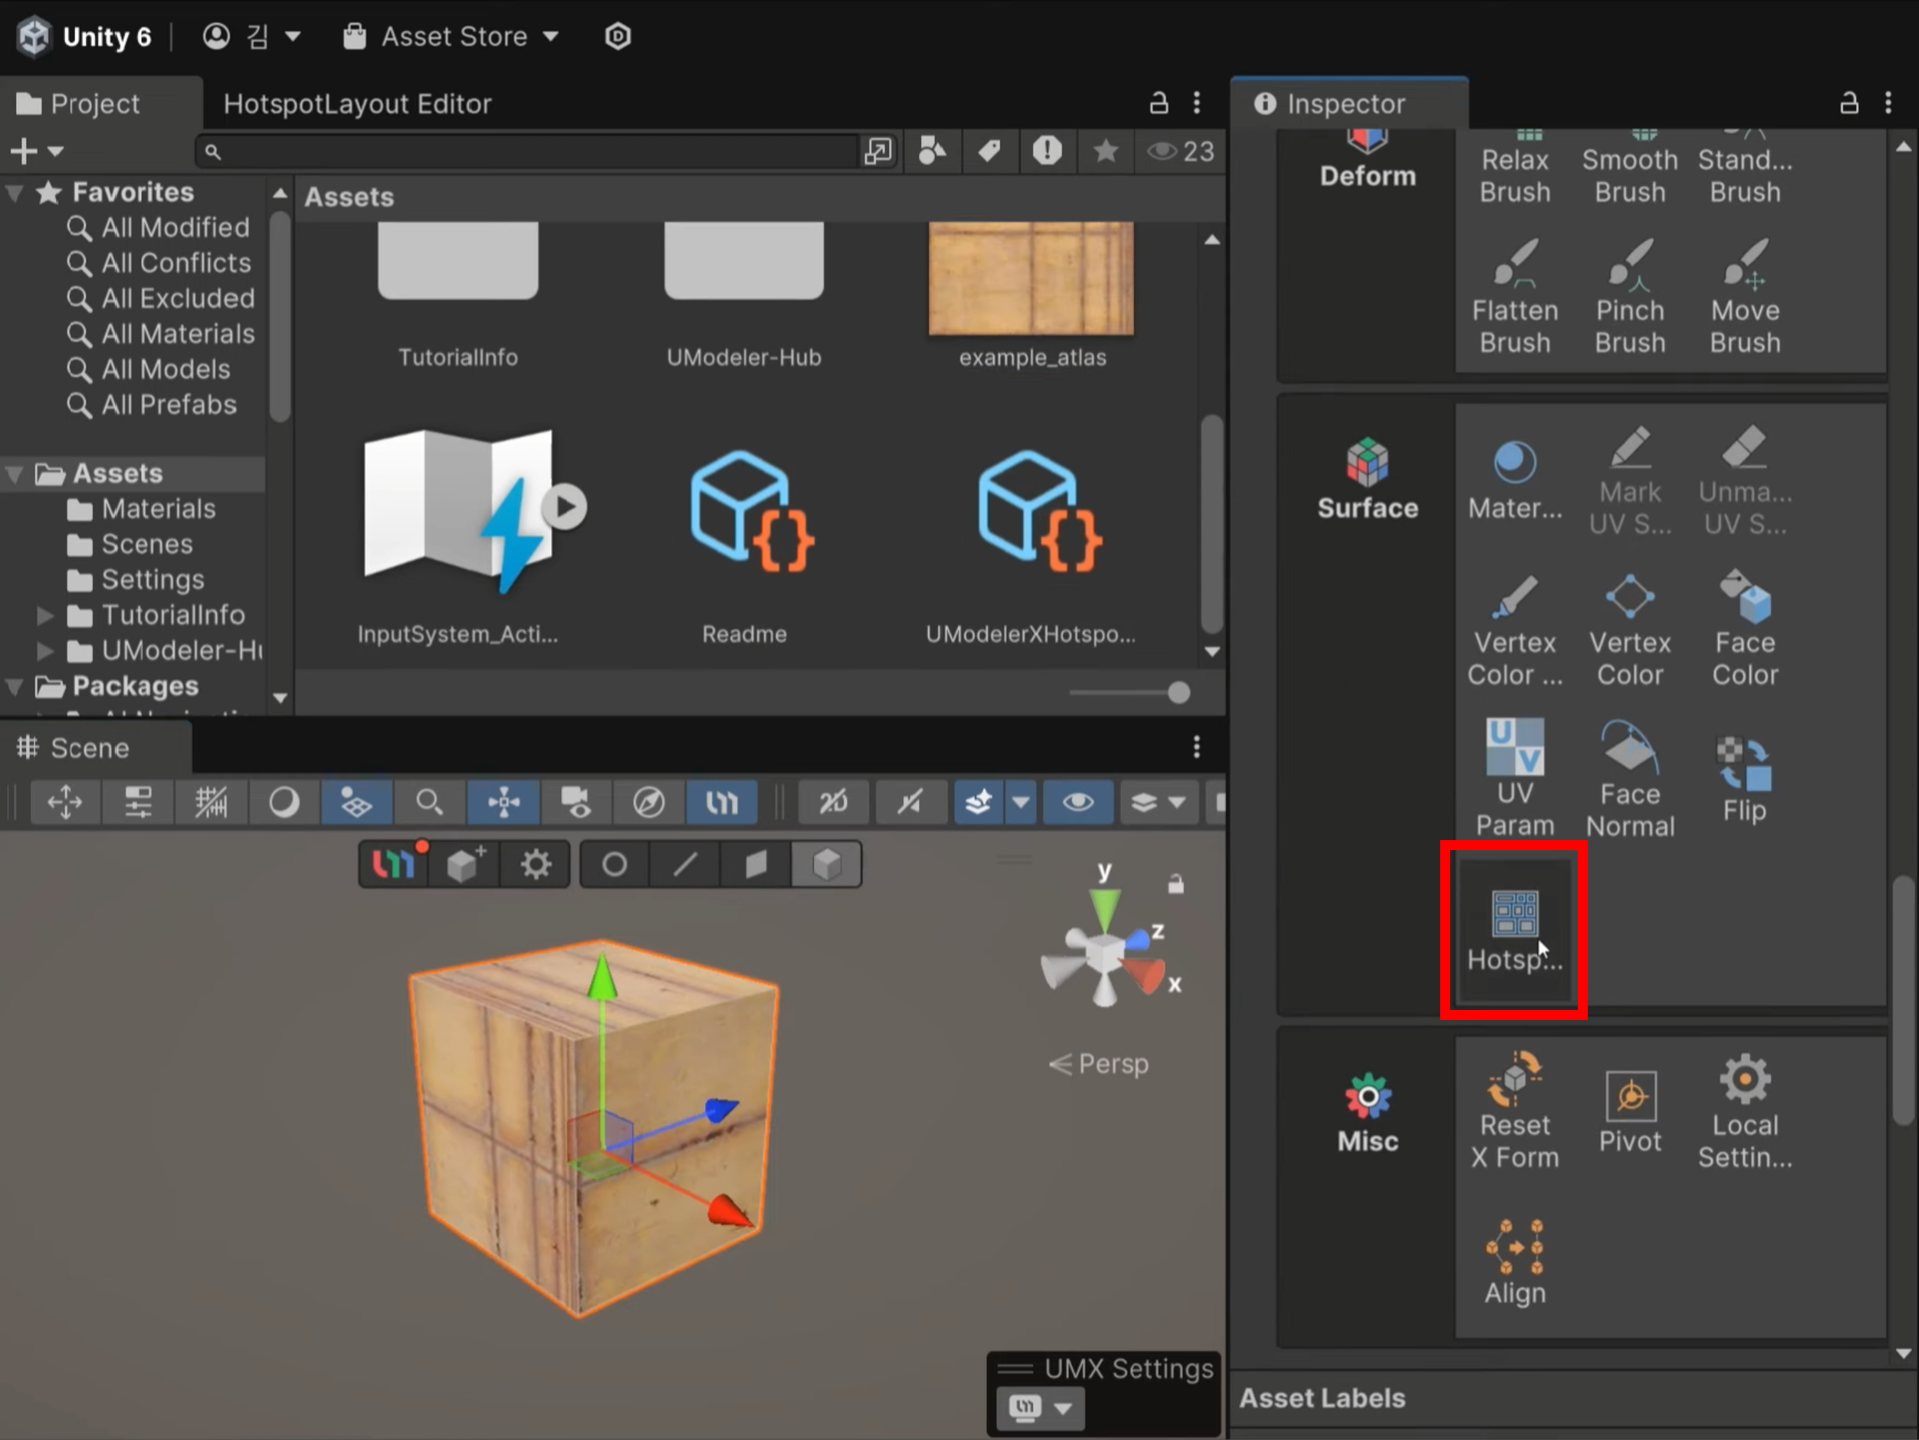
3.Run the Surface > Hotspot Texturing tool.
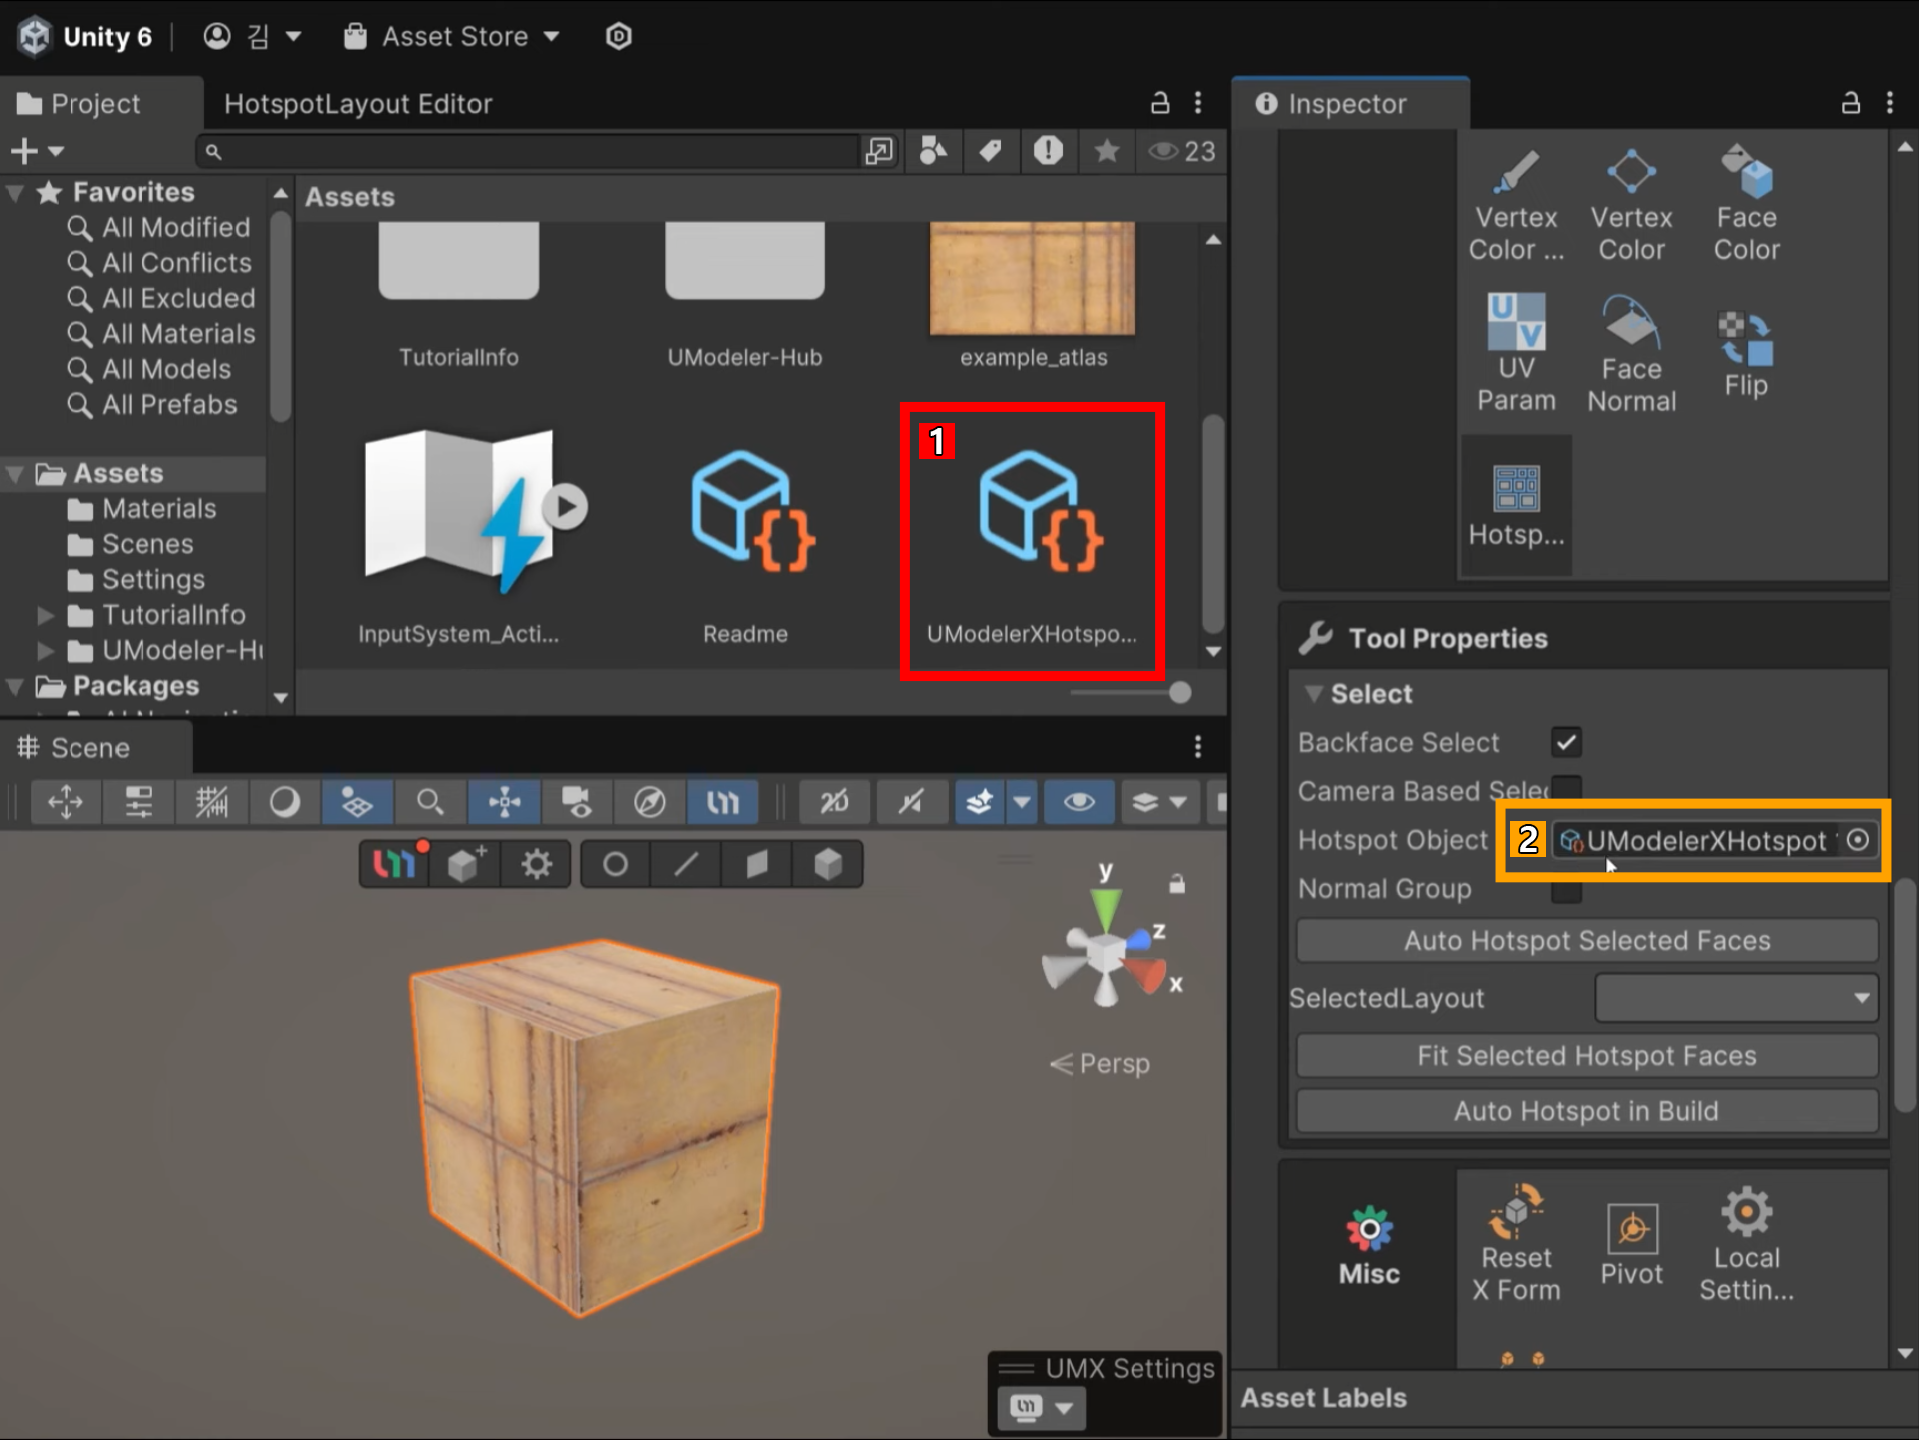
4.Assign the created Hotspot Layout to the Hotspot Object.
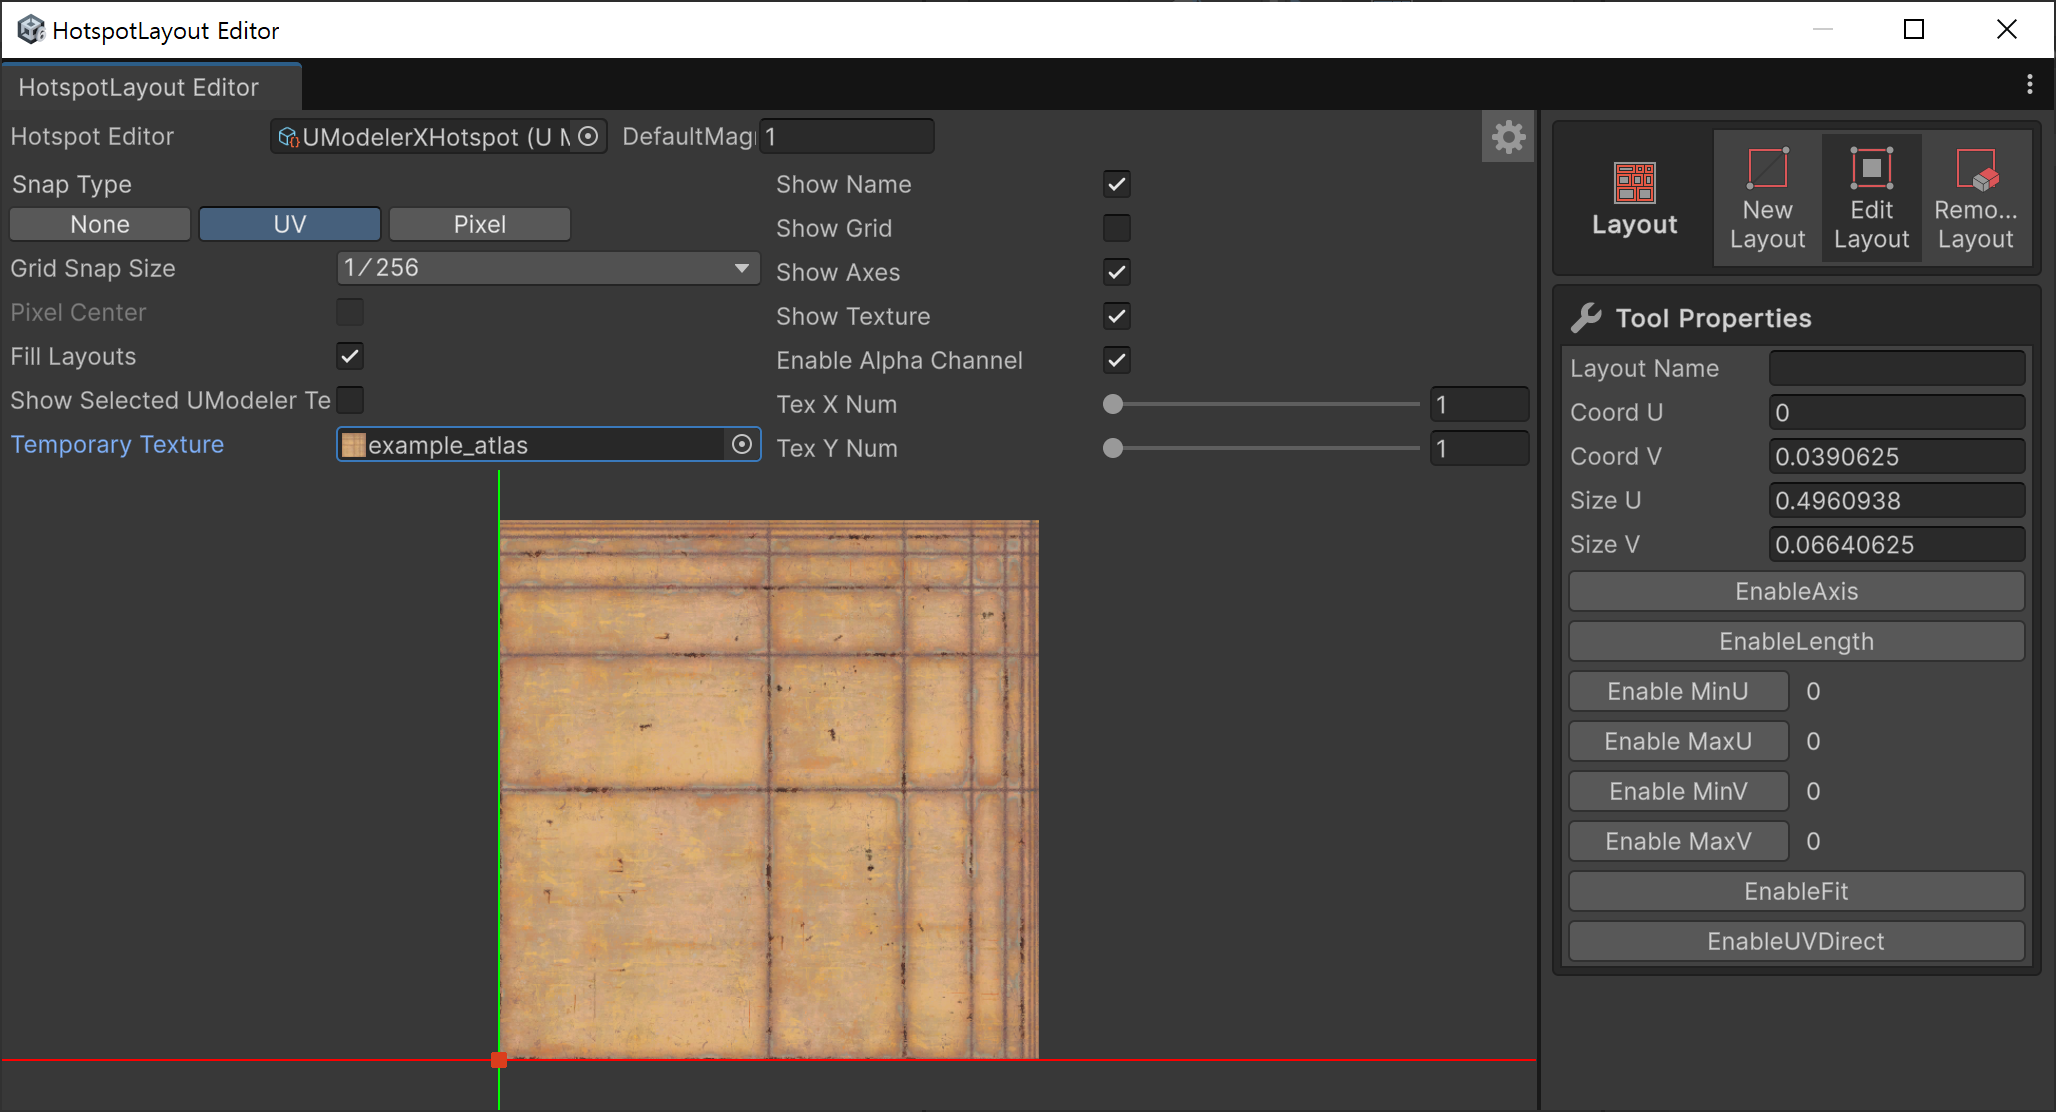
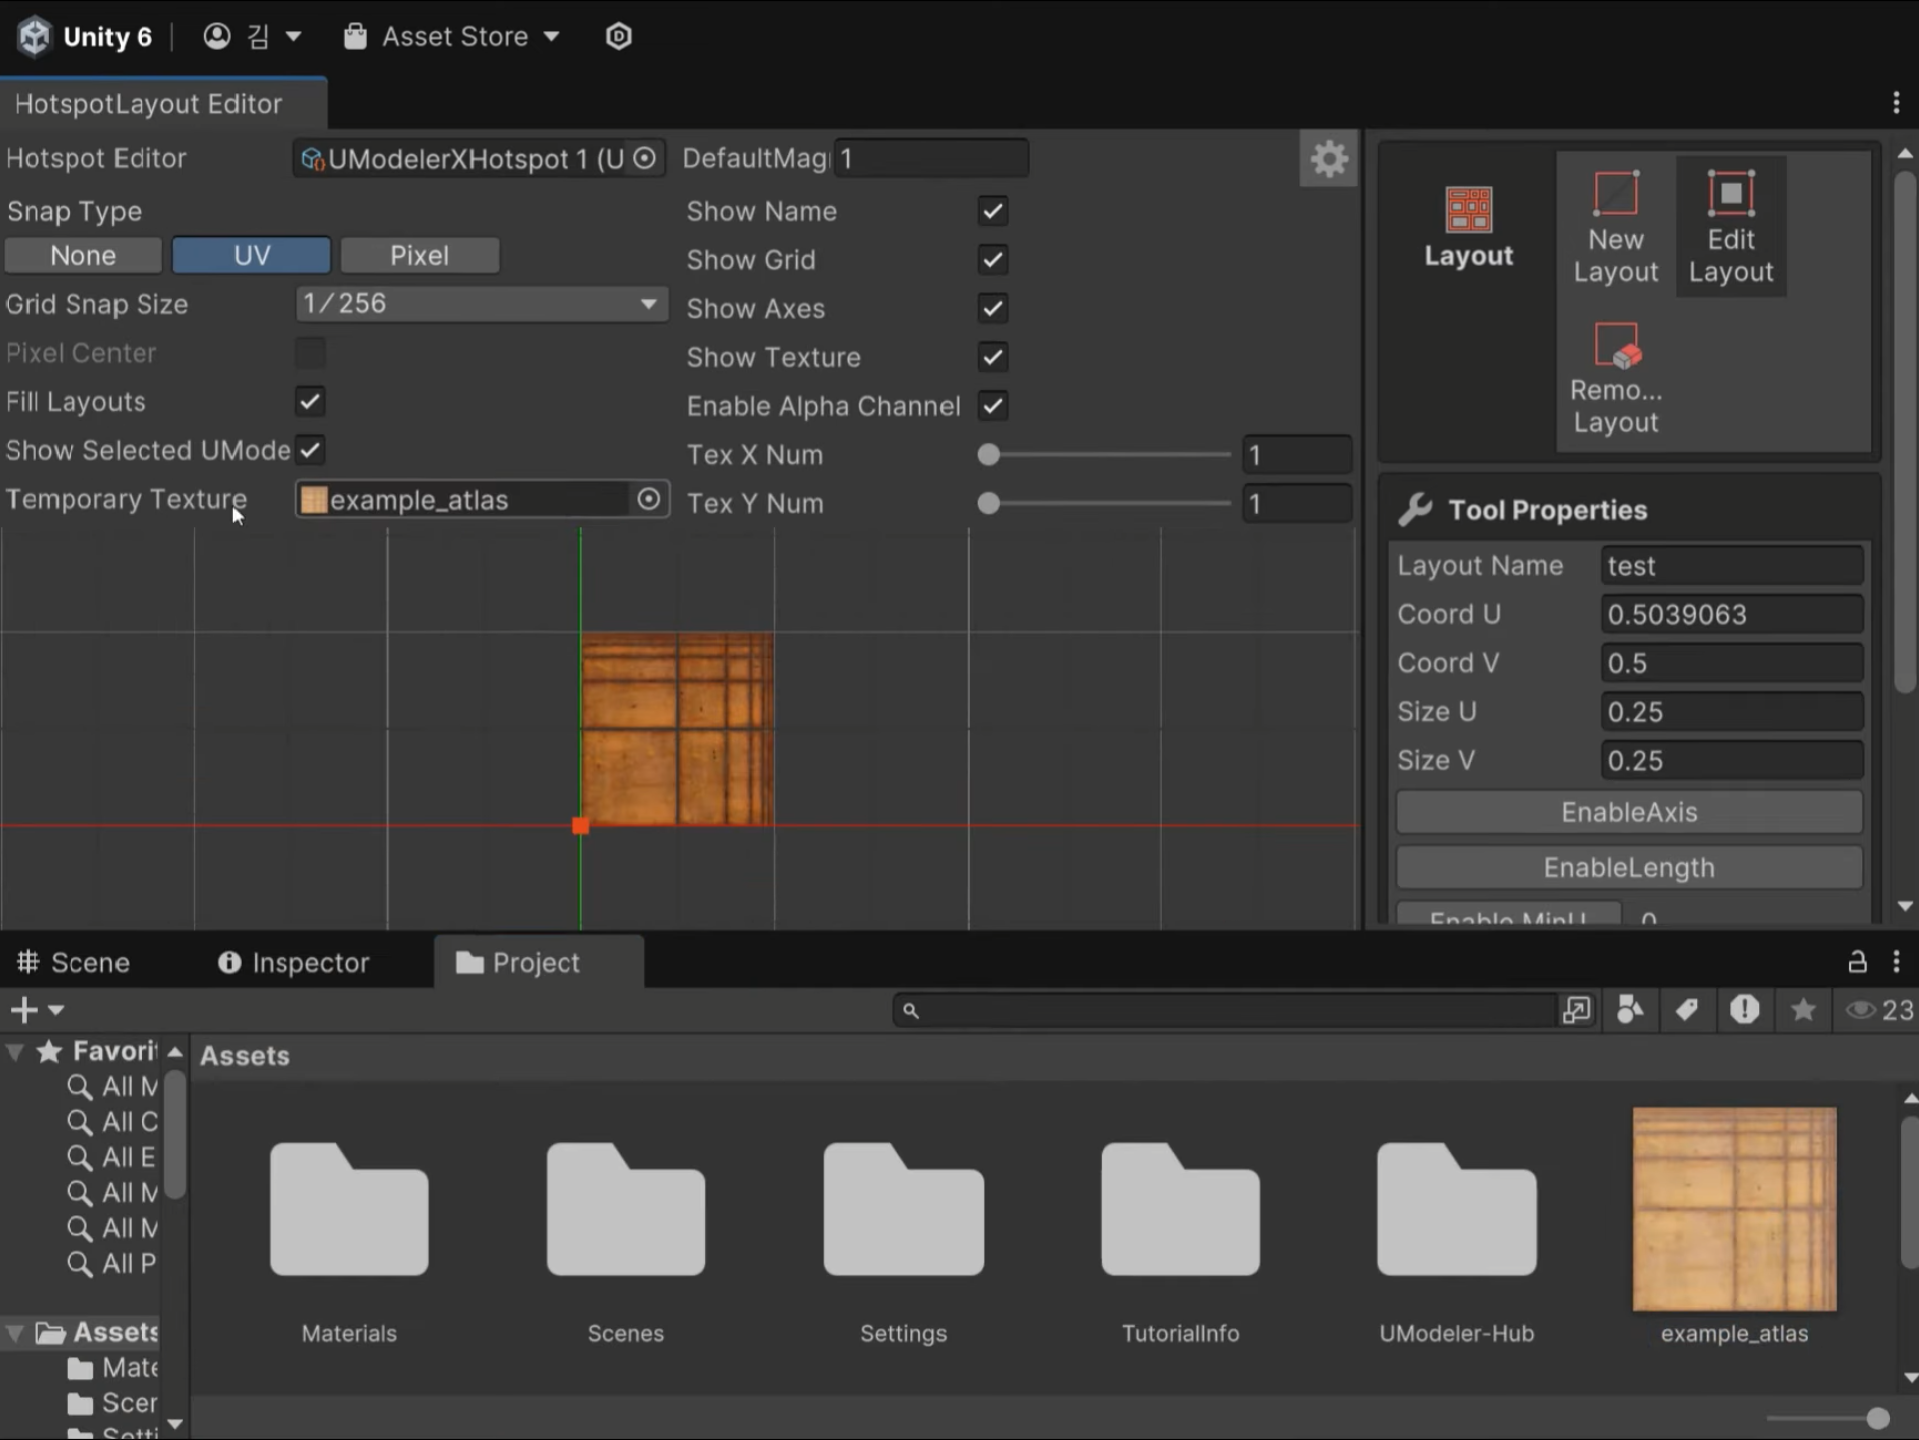
5.Double-click the Hotspot Object to launch the Hotspot Layout Editor.
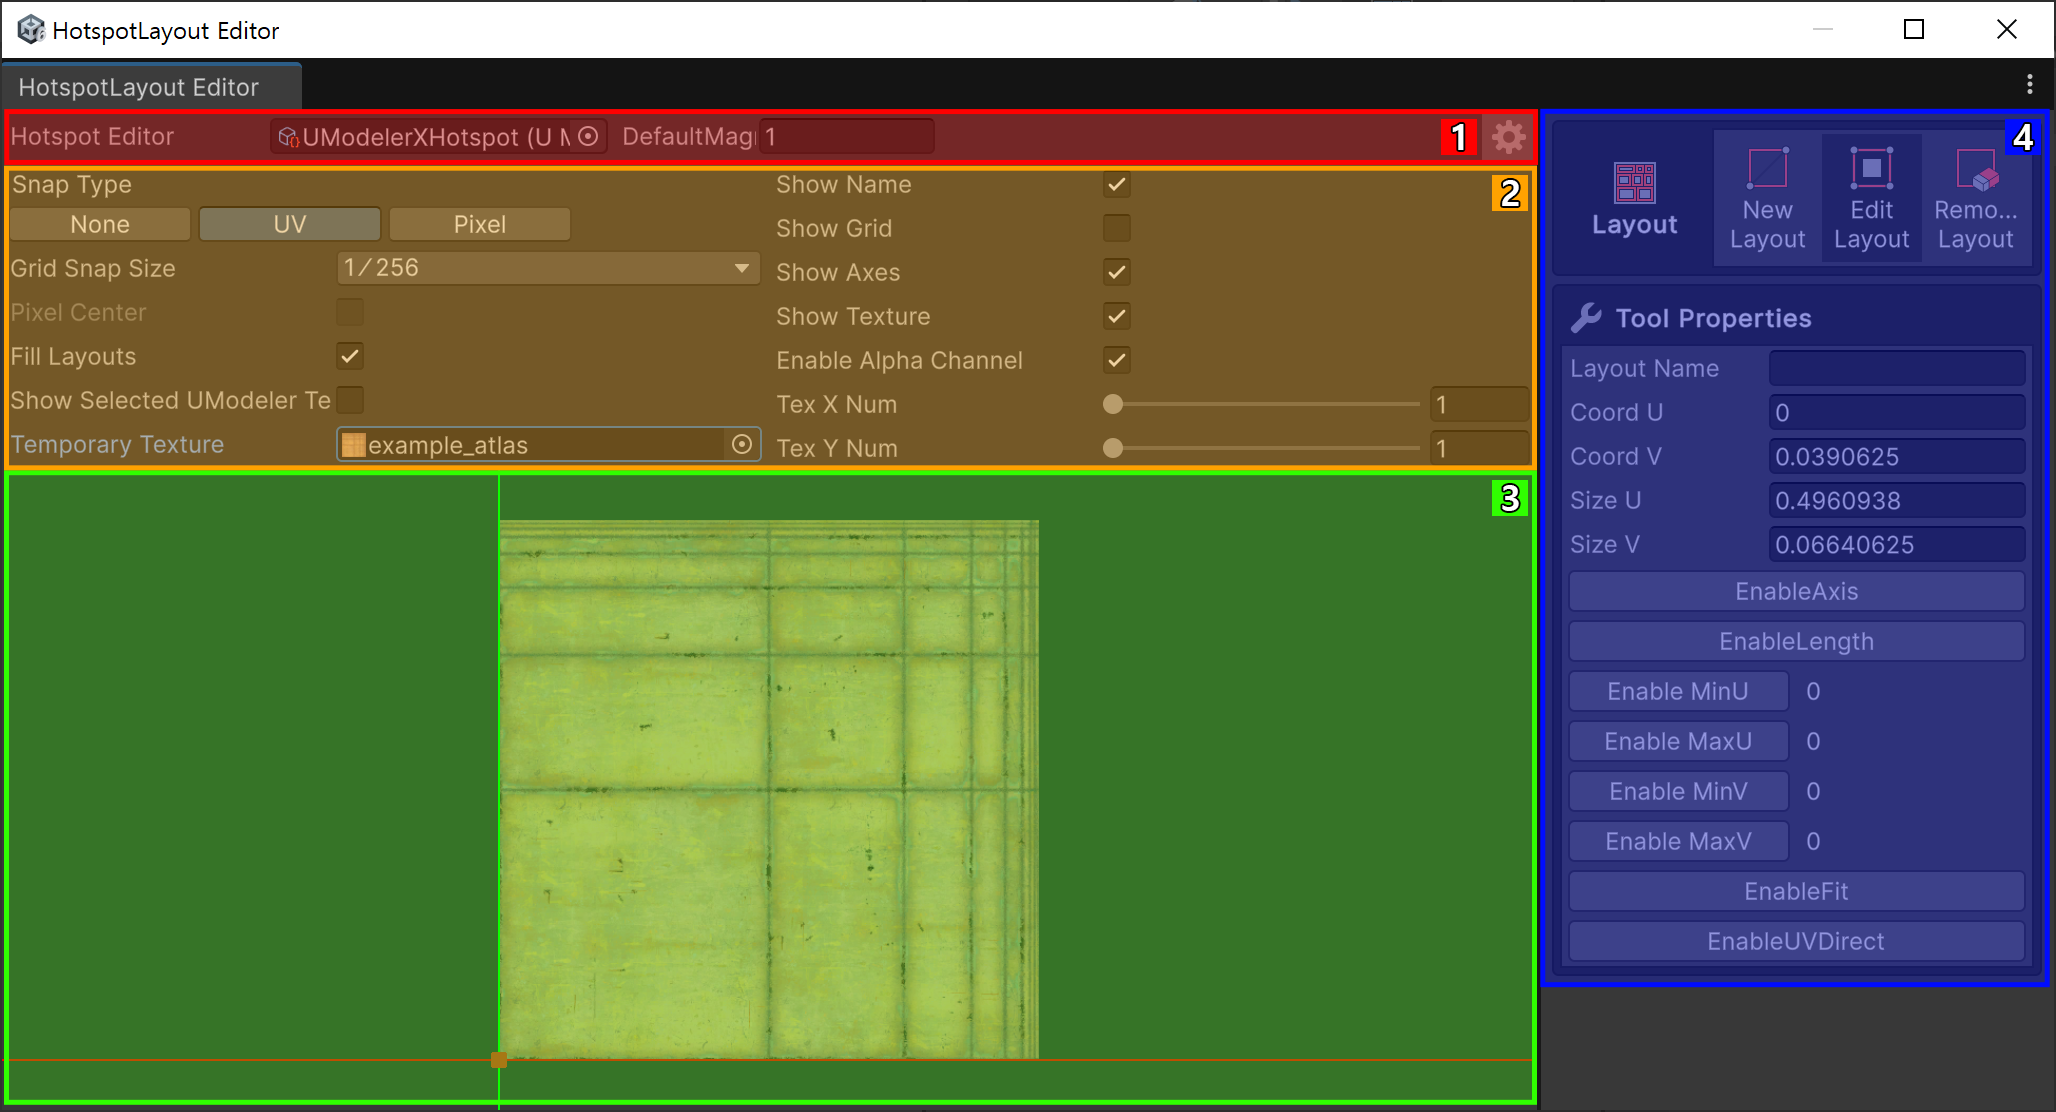
1. Tool Bar
Includes tools such as pan, transform gizmo, UV element selection, cursor, and pivot toggle.
Hotspot Editor
Displays the currently applied Hotspot Layout.
DefaultMag
DefaultMag defines the scaling factor that matches the texture size to the 3D world scale.
2. Settings Area
This area allows configuration related to the Hotspot Layout Editor.
Snap Type
Sets the snapping behavior for editing elements.
SnapType: None
No snapping is applied.
FillLayouts
Fills the inside of the layout area.
Show selected umodeler texture
Displays the main texture of the object in the editor if one is assigned.
Temporary Texture
Temporarily registers and displays a texture in the workspace.
ShowGrid
Displays a grid in the editor workspace.
ShowAxes
Shows U and V axes corresponding to the X and Y axes.
ShowTexture
Displays the assigned texture.
EnableAlphaChannel
Applies the alpha channel of the texture.
TexXNum
Sets the number of horizontal texture tiling.
TexYNum
Sets the number of vertical texture tiling.
SnapType: UV
Applies Grid Snap Size to the full UV space.
GridSnapSize
Sets the grid spacing used when moving, rotating, or scaling elements.
FillLayouts
Fills the inside of the layout area.
Show selected umodeler texture
Displays the main texture of the object in the editor if one is assigned.
Temporary Texture
Temporarily registers and displays a texture in the workspace.
ShowGrid
Displays a grid in the editor workspace.
ShowAxes
Shows U and V axes corresponding to the X and Y axes.
ShowTexture
Displays the assigned texture.
EnableAlphaChannel
Applies the alpha channel of the texture.
TexXNum
Sets the number of horizontal texture tiling.
TexYNum
Sets the number of vertical texture tiling.
SnapType: Pixel
UV vertices snap to the pixels of the applied texture.
PixelCenter
When enabled, vertices snap to the center of each pixel. When disabled, they snap to pixel edges.
FillLayouts
Fills the inside of the layout area.
Show selected umodeler texture
Displays the main texture of the object in the editor if one is assigned.
Temporary Texture
Temporarily registers and displays a texture in the workspace.
ShowGrid
Displays a grid in the editor workspace.
ShowAxes
Shows U and V axes corresponding to the X and Y axes.
ShowTexture
Displays the assigned texture.
EnableAlphaChannel
Applies the alpha channel of the texture.
TexXNum
Sets the number of horizontal texture tiling.
TexYNum
Sets the number of vertical texture tiling.
3. Workspace
This is the area for editing hotspot layouts, where textures are visible over a grid.
4. Layout Group Area
This is the area for editing hotspot layouts, where textures are visible over a grid.
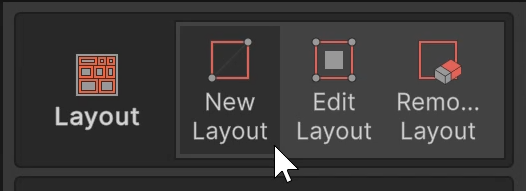
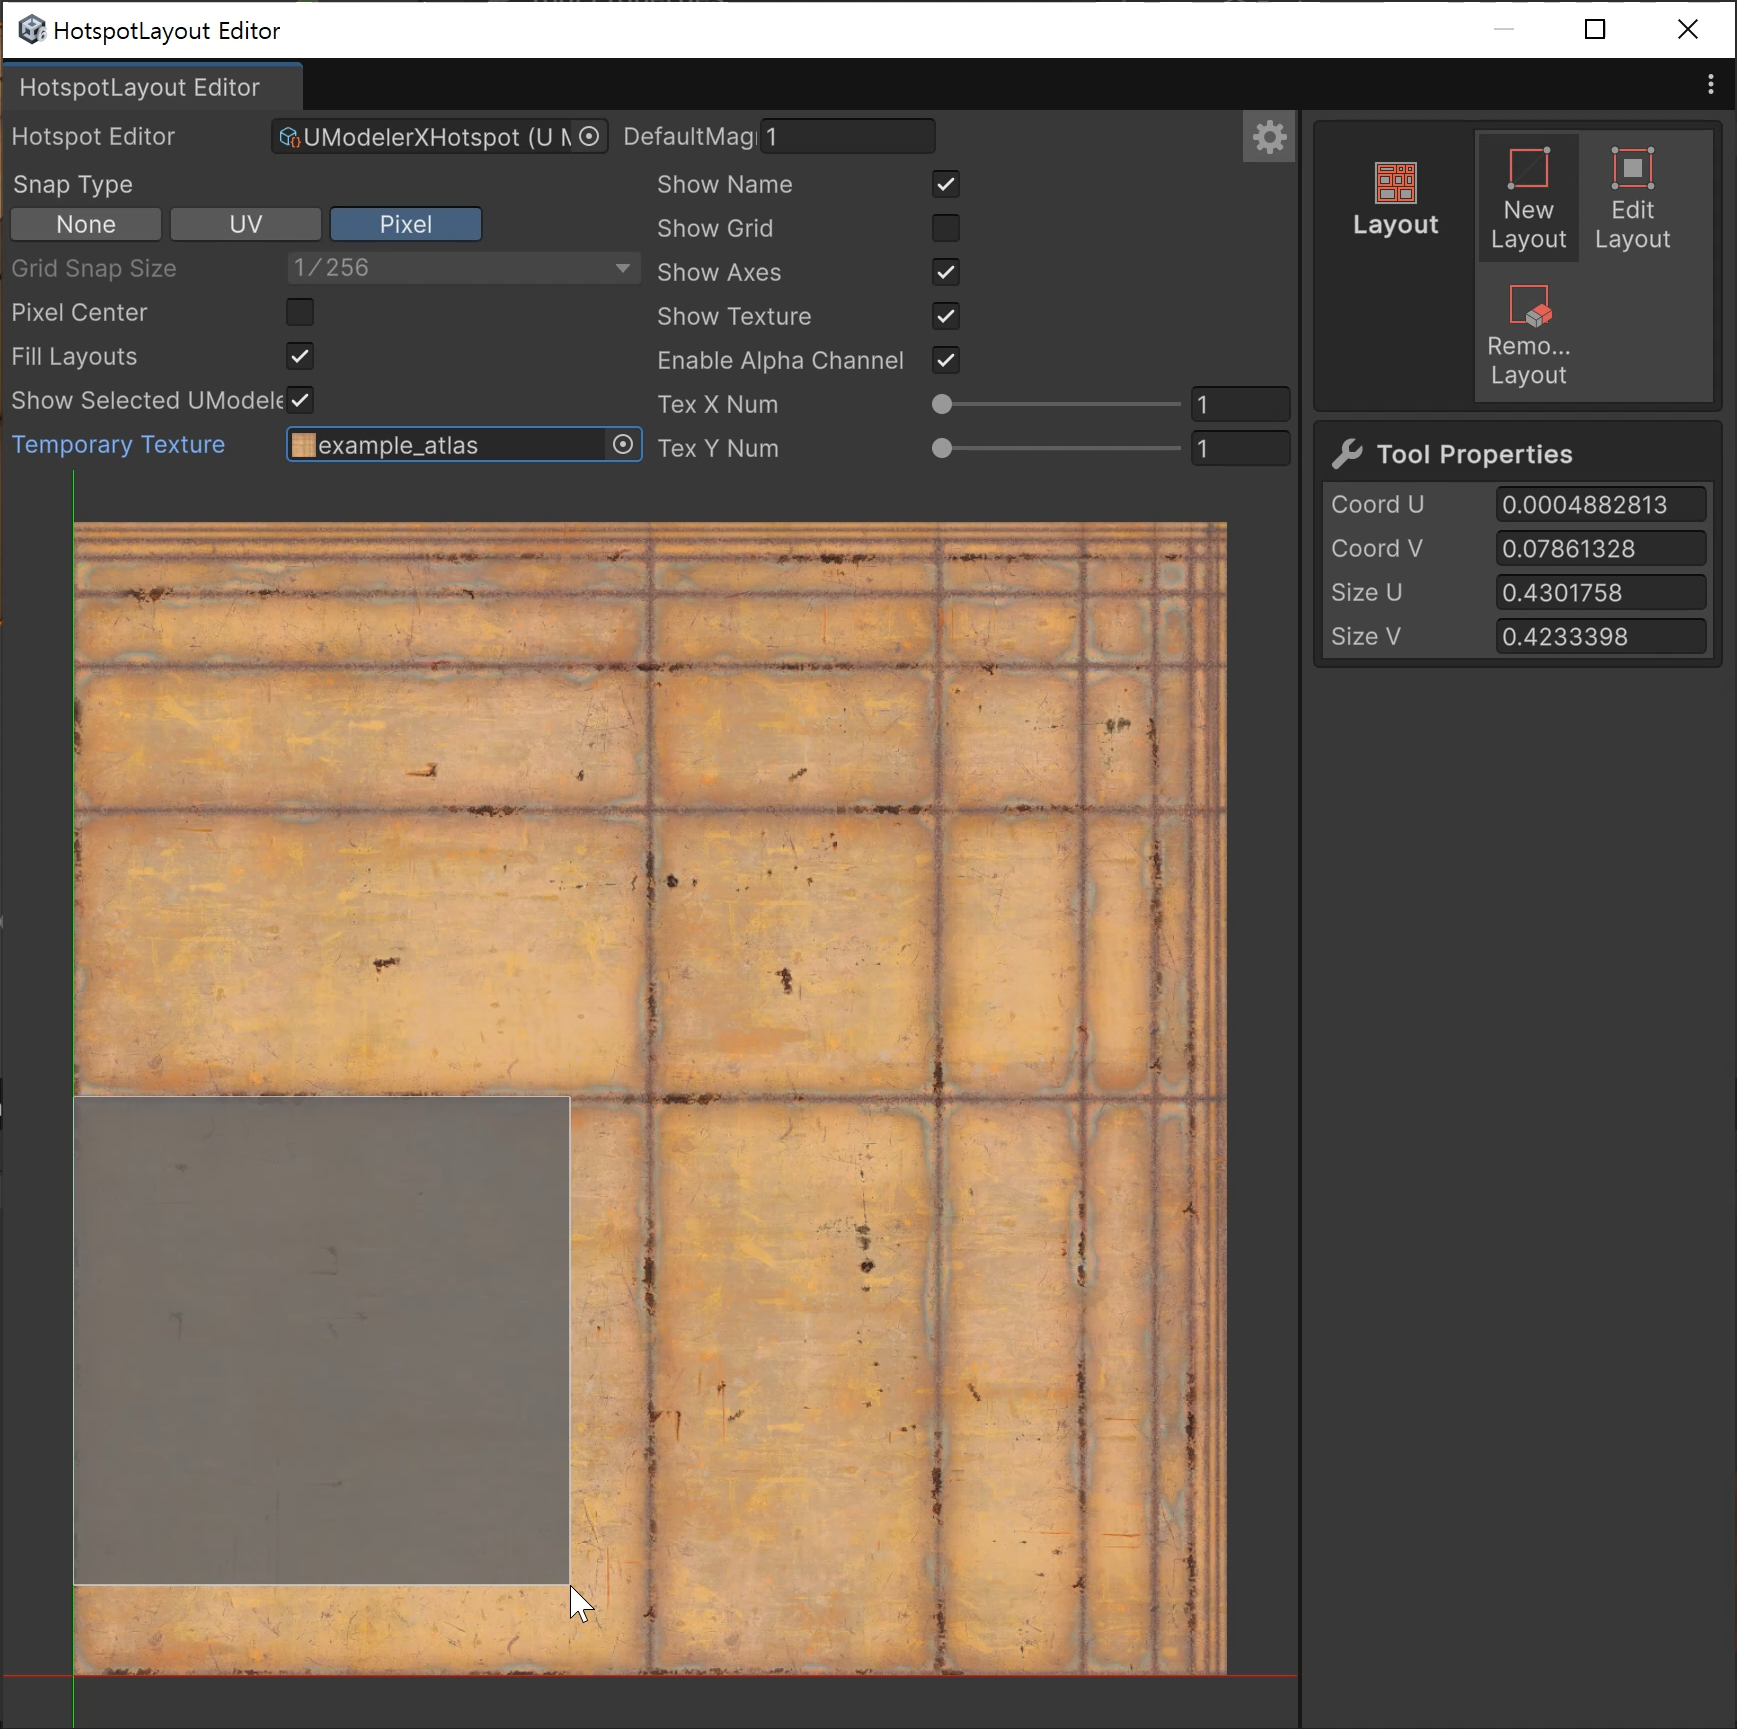
New Layout
Define a new layout area.
Coord U Adjusts the U coordinate.
Coord V Adjusts the V coordinate.
Size U Sets the width in U.
Size V Sets the height in V.
Edit Layout
Modify an existing layout.
Layout Name Assigns a name to the layout.
Coord U Adjusts the U coordinate of the layout.
Coord V Adjusts the V coordinate of the layout.
Size U Adjusts the width (U size) of the layout.
Size V Adjusts the height (V size) of the layout.
EnableAxis Enables direction by 3D normal.
- AxisType
AxisType: TopOnly
Applies normals only upward.
AxisType: BottomOnly
Applies normals only downward.
AxisType: TopBottom
Applies both upward and downward.
AxisType: SideOnly
Applies sideward normals only.
AxisType: TopSide
Applies upward and sideward normals.
AxisType: BottomSide
Applies downward and sideward normals.
- LimitAngle : Limits effect based on the face angle of the model.
EnableLength
Set 3D size to apply. If not set, uses DefaultMag * UV Size.
- Enable MinU : Sets the minimum range value along the U axis of the coordinates.
- Enable MaxU : Sets the maximum range value along the U axis of the coordinates.
- Enable MinV : Sets the minimum range value along the V axis of the coordinates.
- Enable MinU : Sets the minimum range value along the U axis of the coordinates.
EnableFit
Automatically fits texture to the designated area.
- Type
Type: Fit
Scales the texture to fit the layout.
Type: Anchor
- LeftTop: Aligns based on top-left.
- RightTop: Aligns based on top-right.
- LeftBottom: Aligns based on bottom-left.
- RightBottom: Aligns based on bottom-right.
EnableUVDirect
Sets the projection direction of the UV.
- XMinus : Projects the UVs based on the negative X-axis direction of the model (−X, left side).
- XPlus : Projects the UVs based on the positive X-axis direction of the model (+X, right side).
- UMinus : Applies the texture in the opposite direction (−U) along the U axis of the UV coordinate system (horizontal direction).
- YPlus : Projects the UVs based on the positive Y-axis direction of the model (+Y, upward).
- ZMinus : Projects the UVs based on the negative Z-axis direction of the model (−Z, back side).
- ZPlus : Projects the UVs based on the positive Z-axis direction of the model (+Z, front side).
Remove Layout
Delete a designated layout area.
How to Use – Defining Layouts
1.Click the New Layout tool in the Layout Group.
2.Specify the area where the texture will be placed based on the mesh scale.
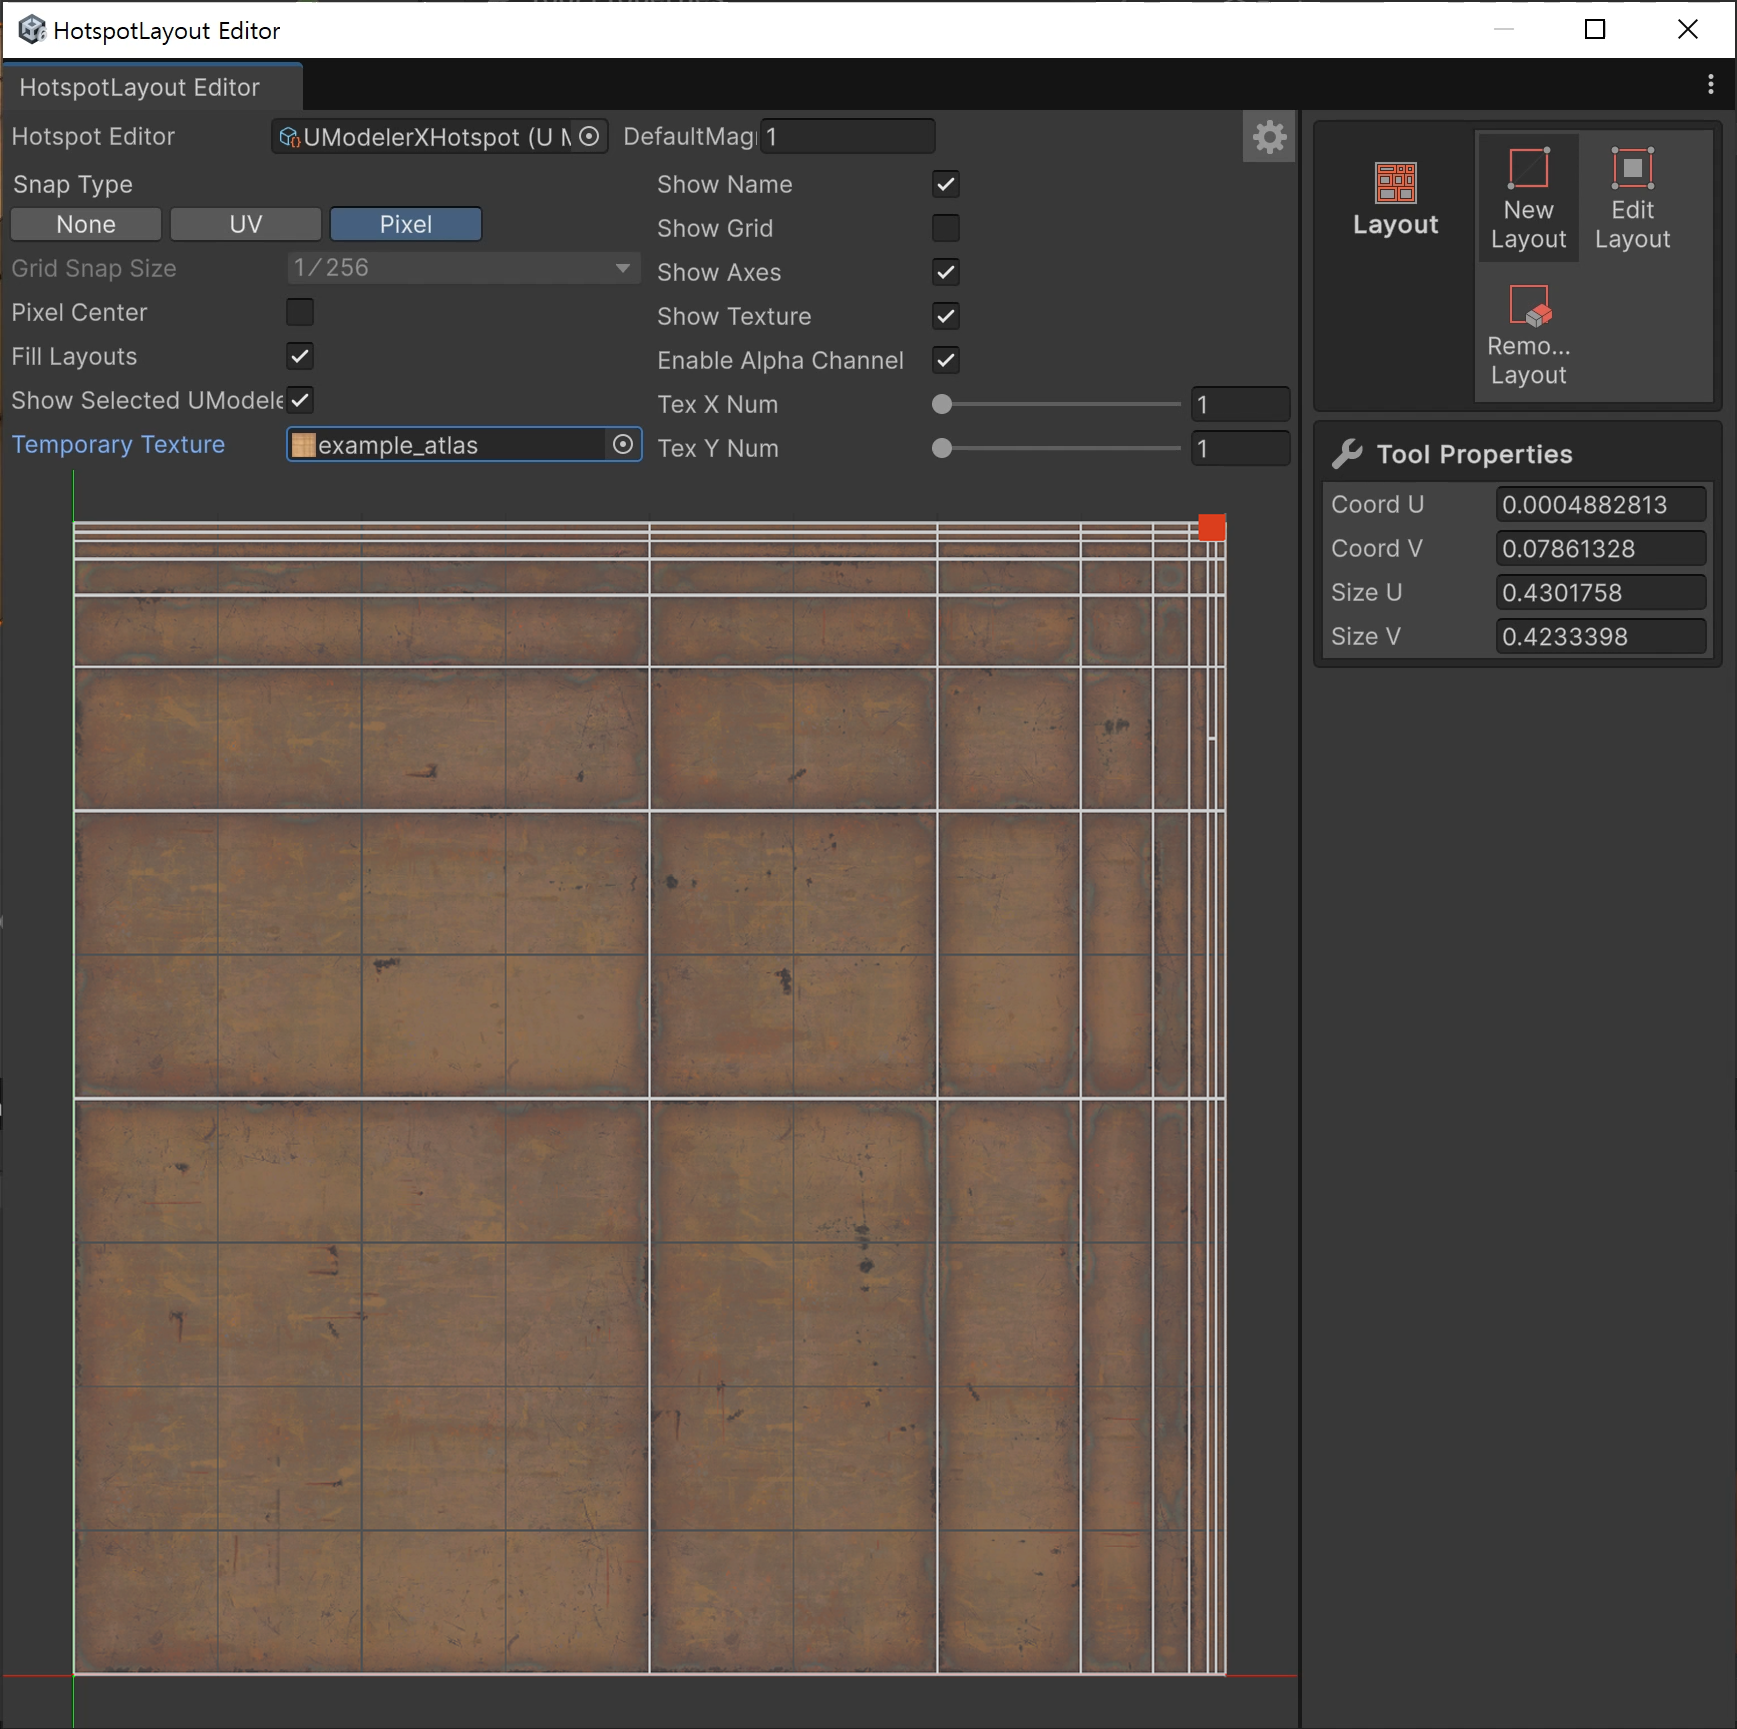
3.Complete the layout definition.
How to Use – Hotspot Texturing
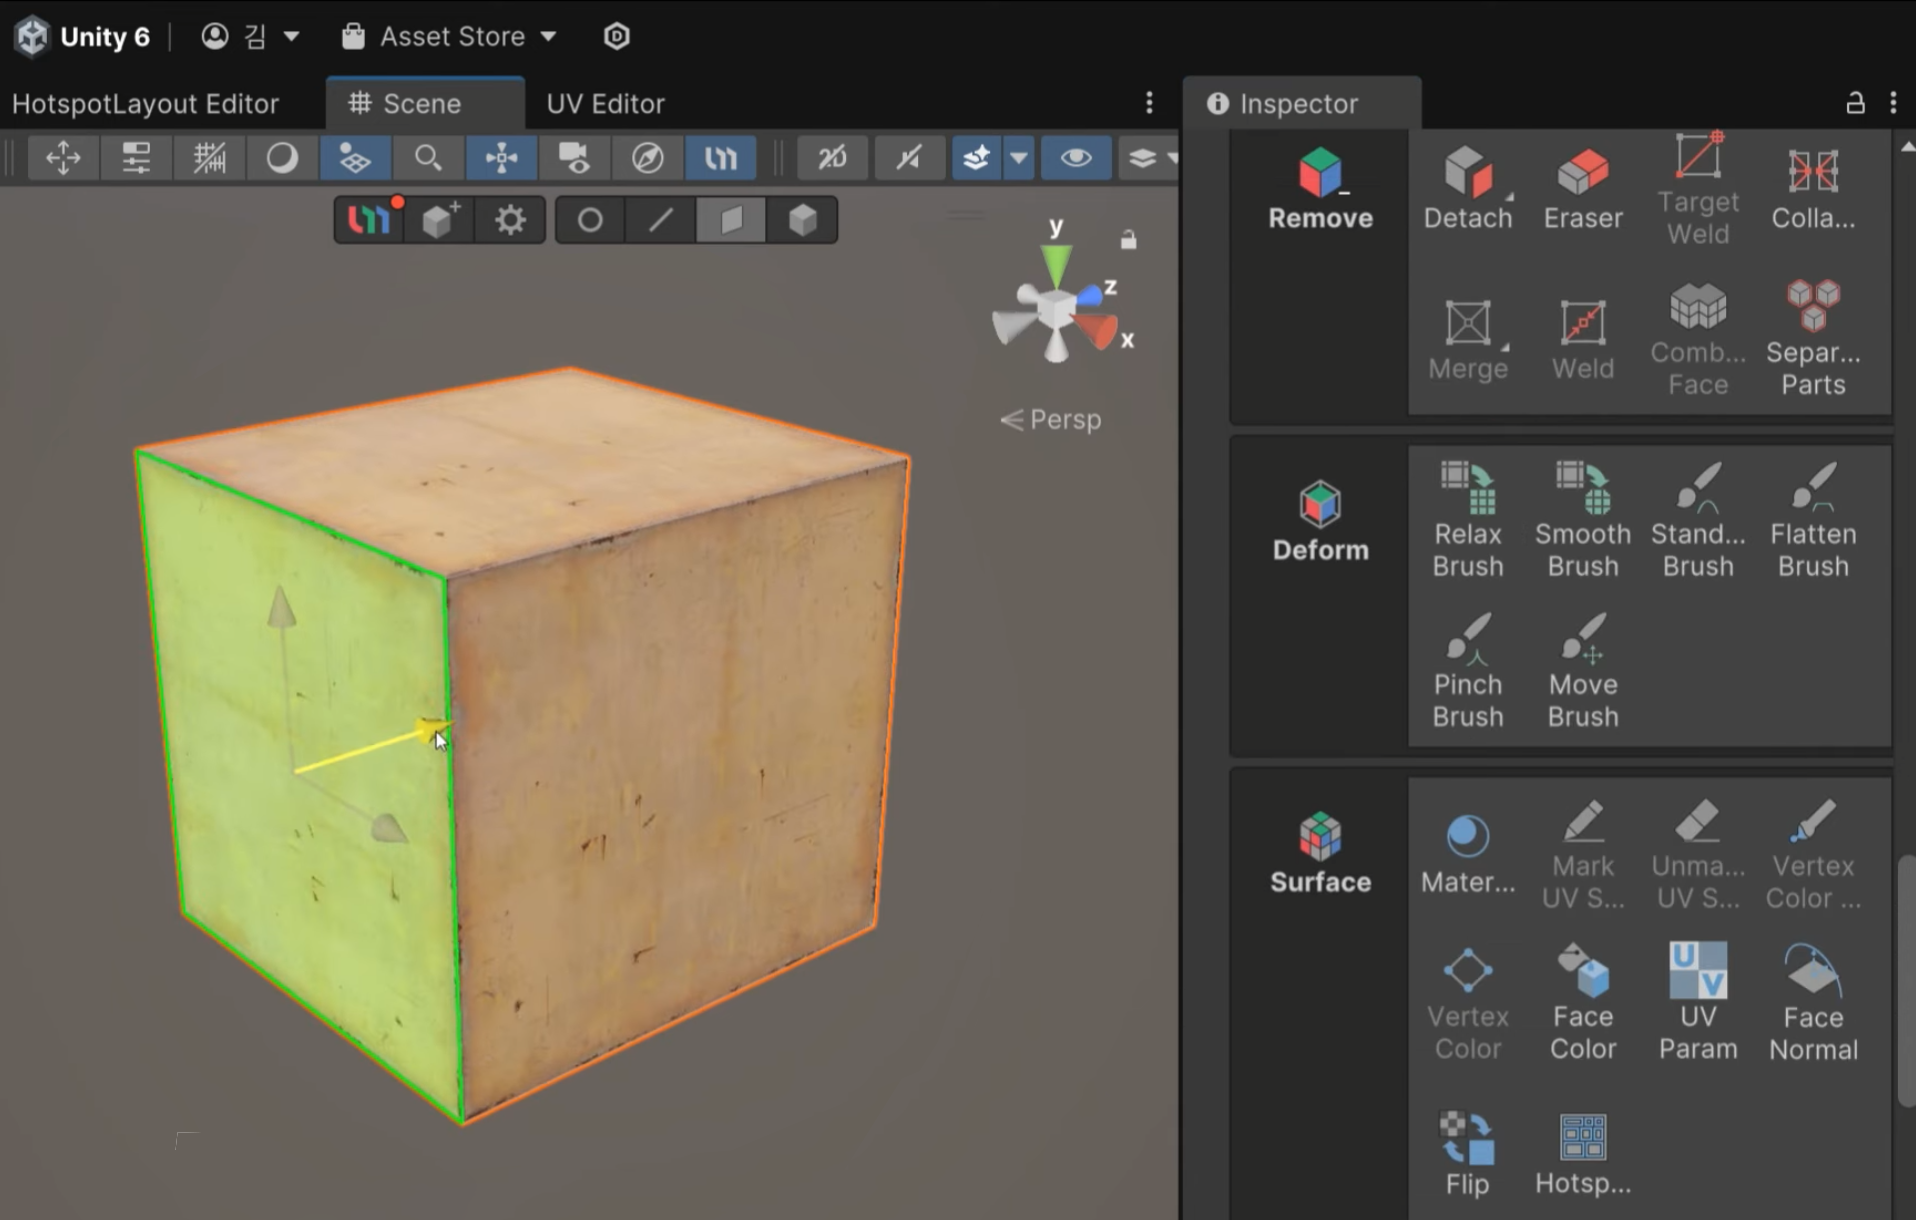
A. Auto Hotspot in Build
This method procedurally updates texture areas in real time when faces are moved.
1.Select the mesh and click Surface > Hotspot > Auto Hotspot in Build.
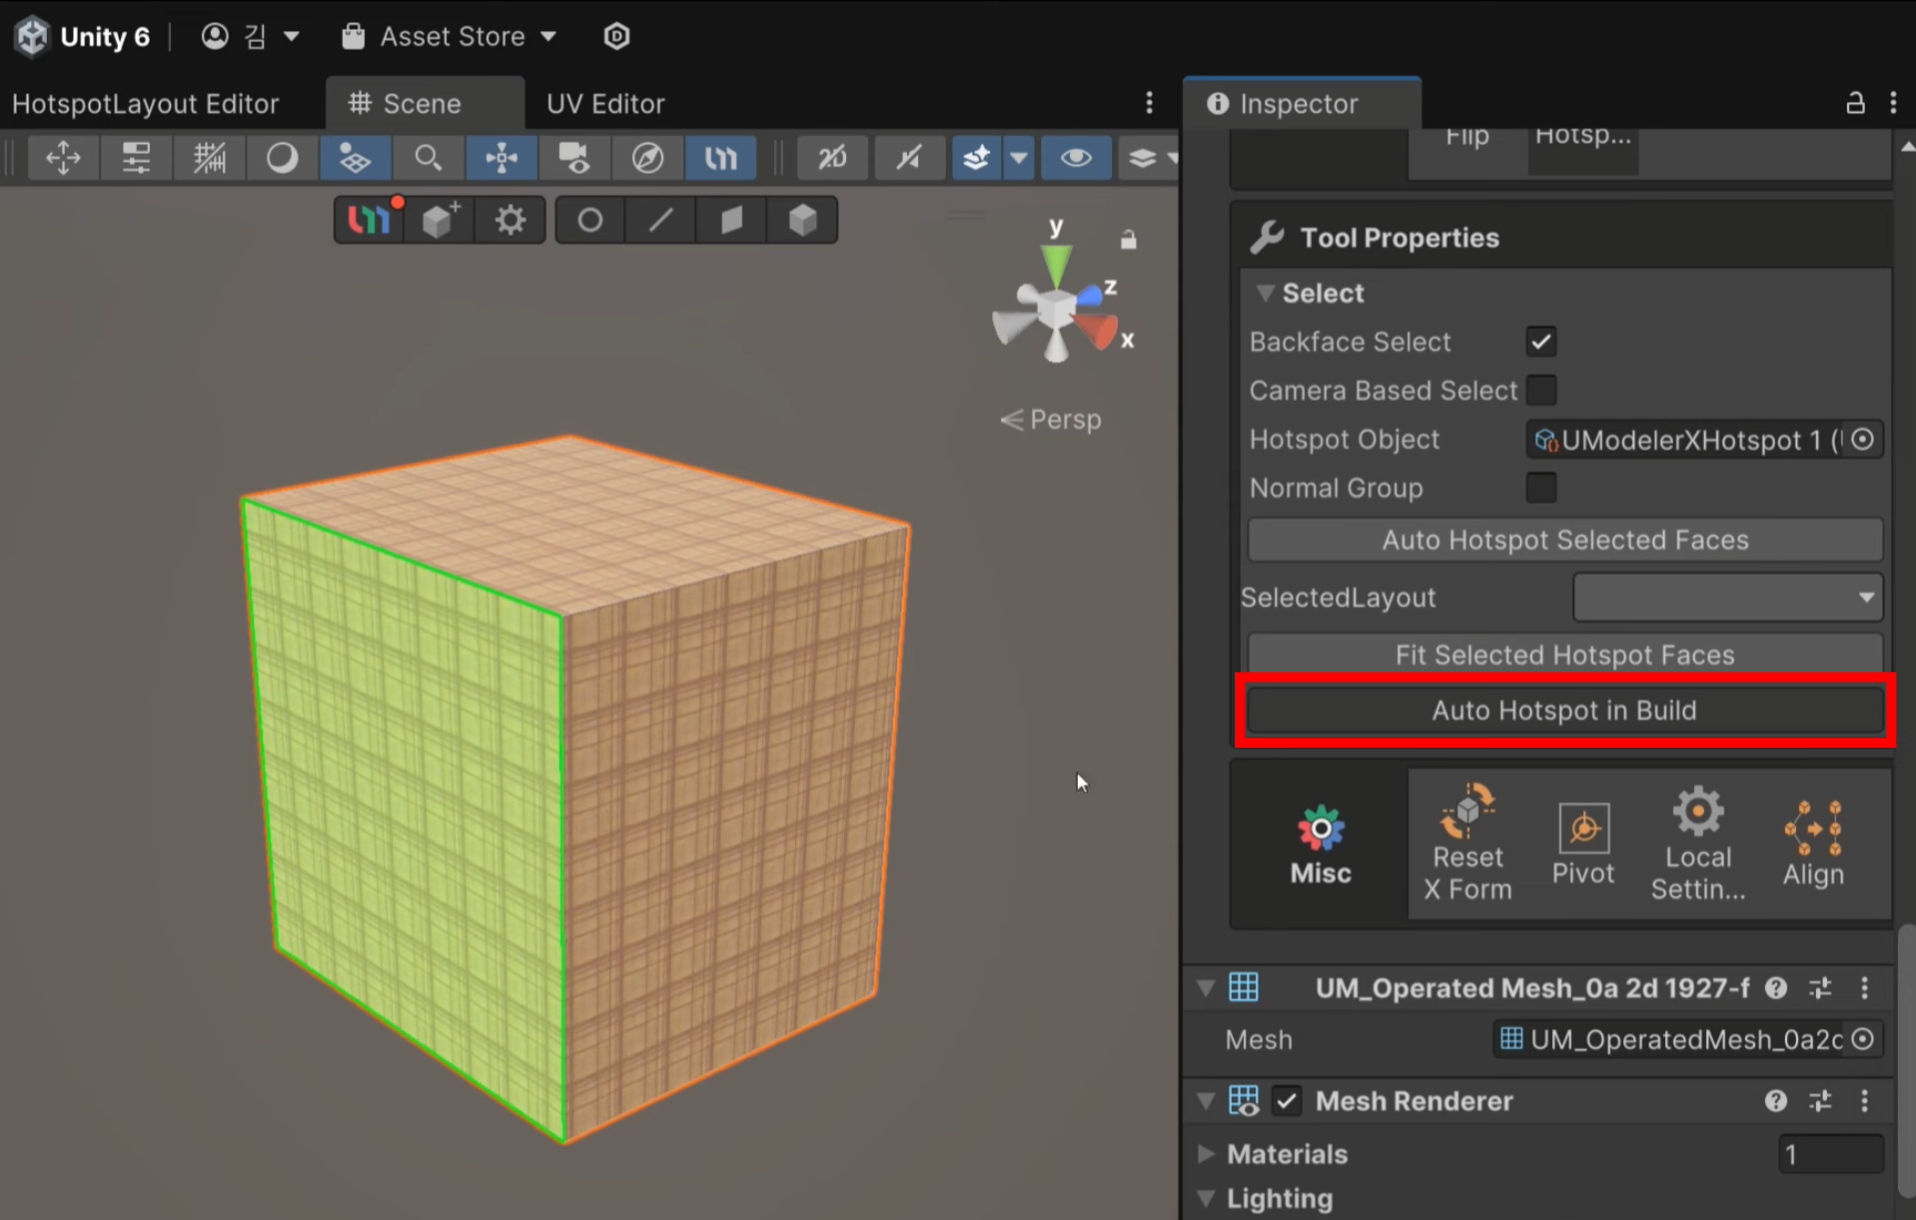
2.Move a face and observe how the texture updates based on the assigned layout.
B. Auto Hotspot Selected Faces
Manually updates texture areas based on selected faces.
1.Select the mesh and click Surface > Hotspot > Auto Hotspot Selected Face.
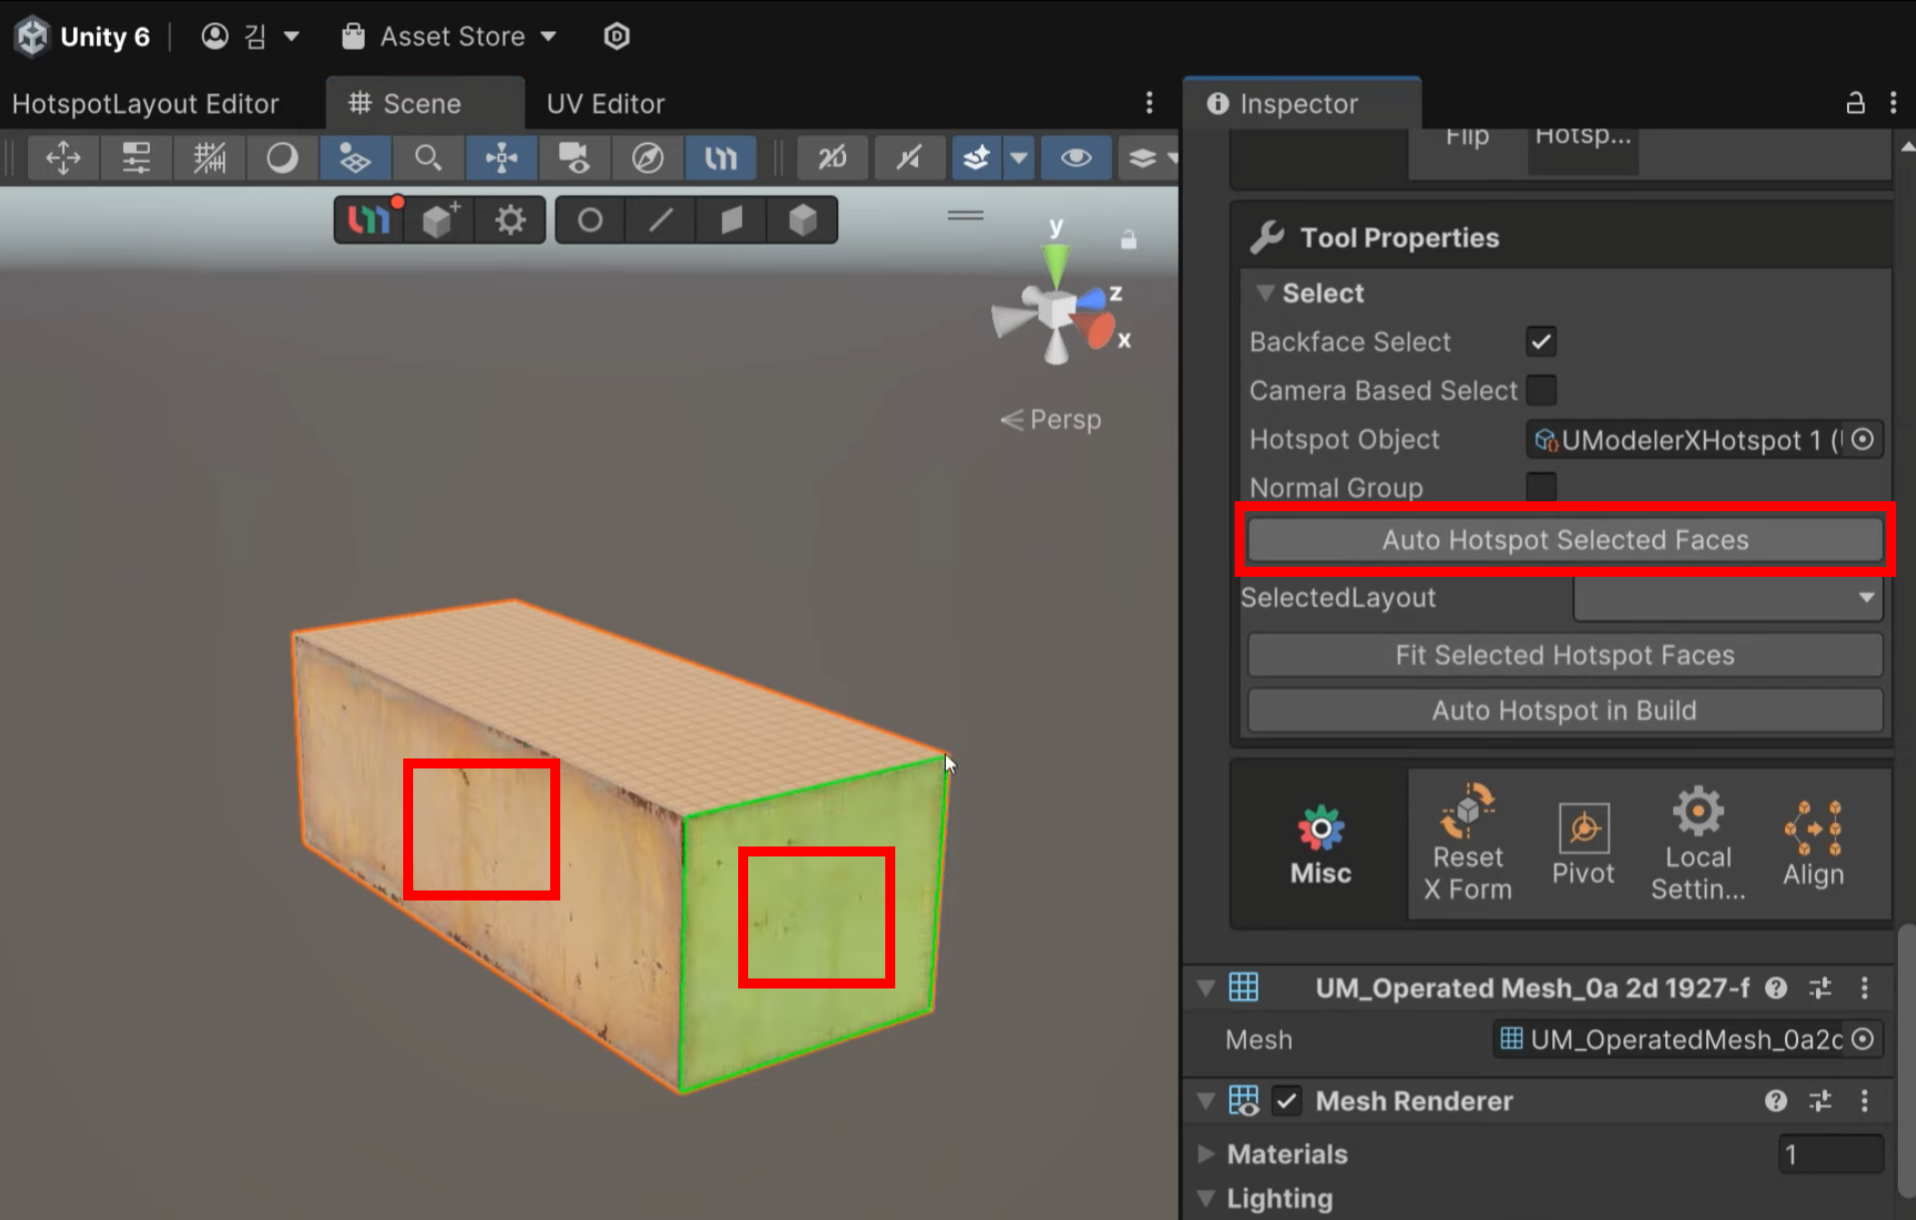
2.Move the selected face and see procedural updates based on the layout.
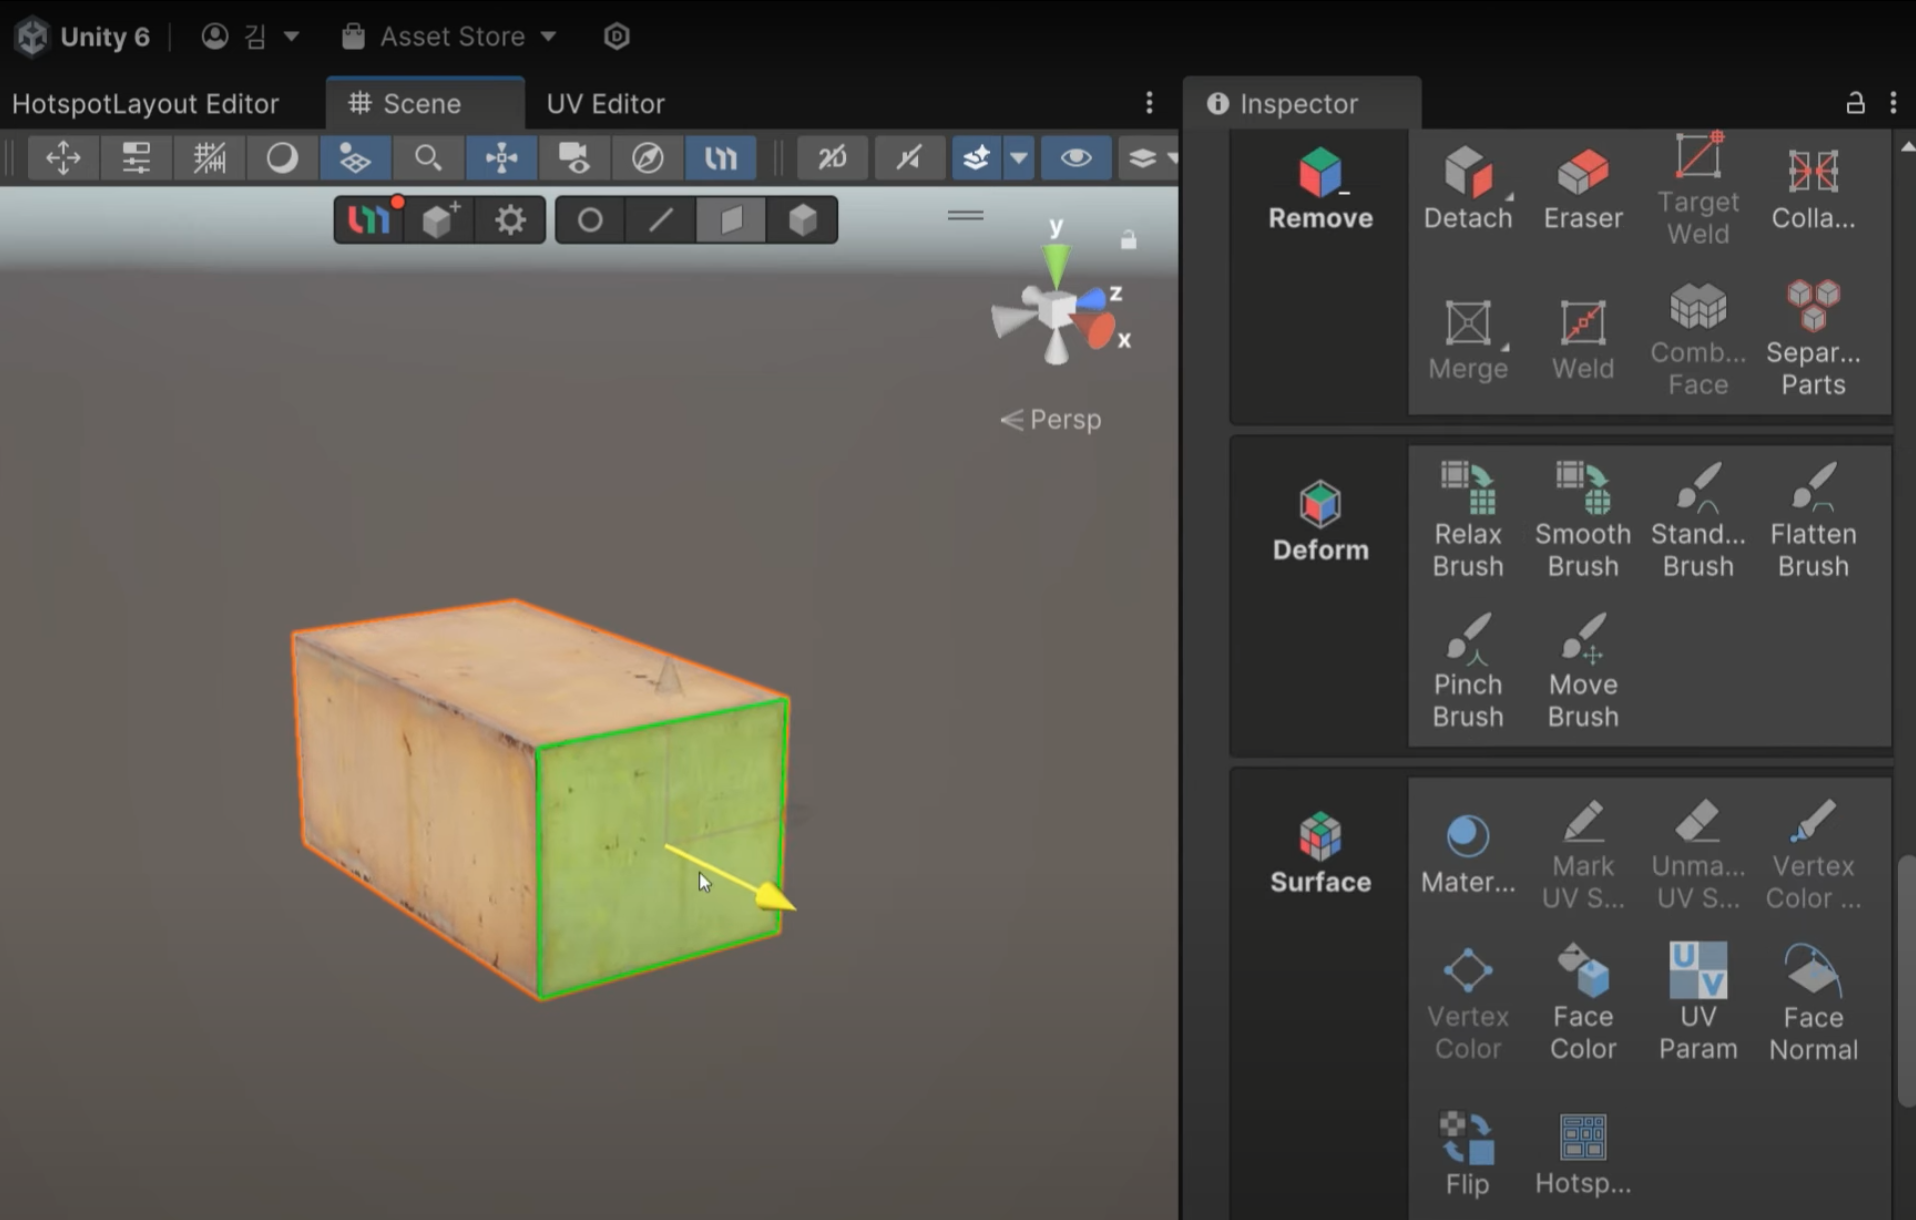
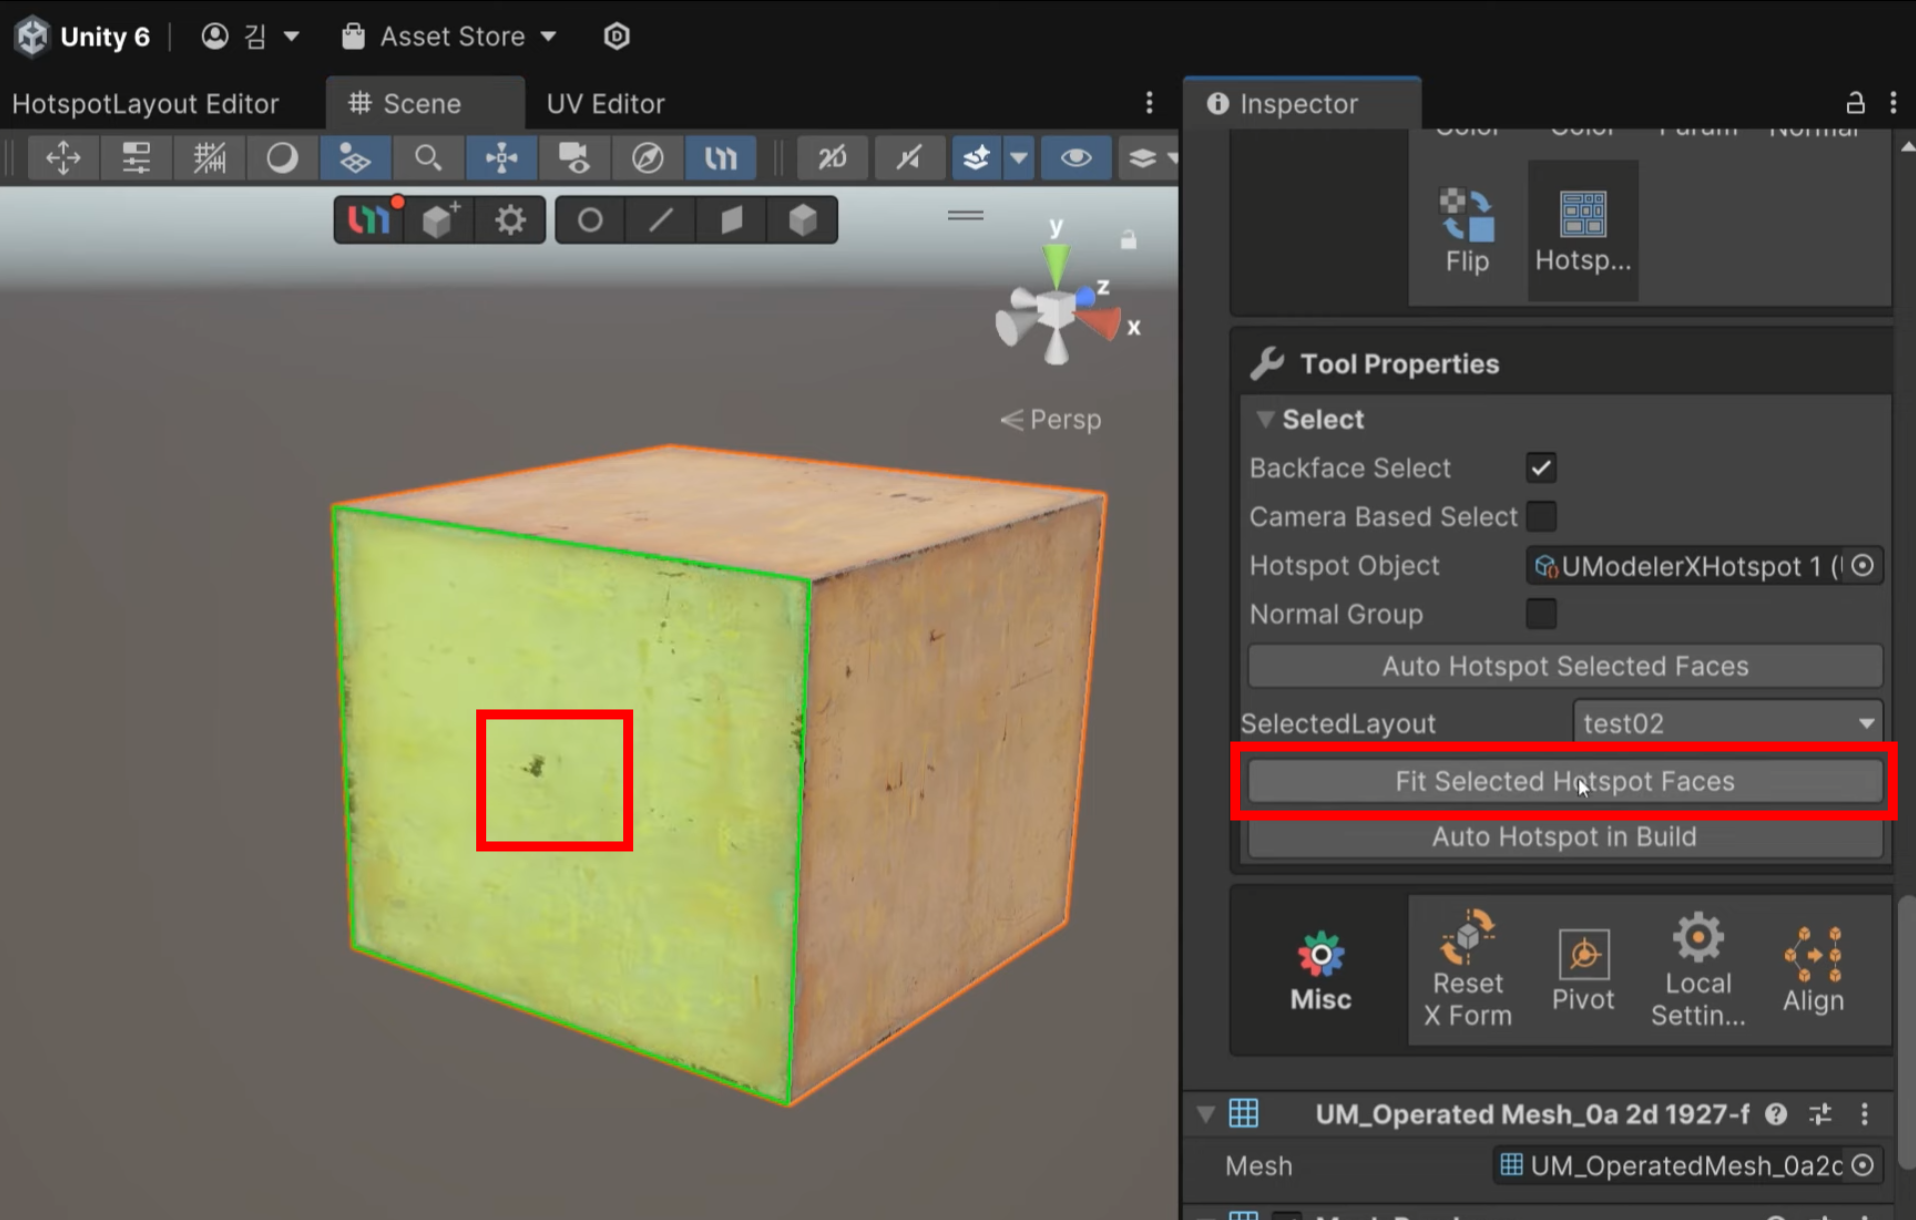
C. Fit Selected Hotspot Faces
Applies the texture accurately by referencing a predefined layout.
1.In the Hotspot Layout Editor, click Edit Layout, then select a face. Set the Layout Name in the Tool Properties panel (e.g., “test02”).
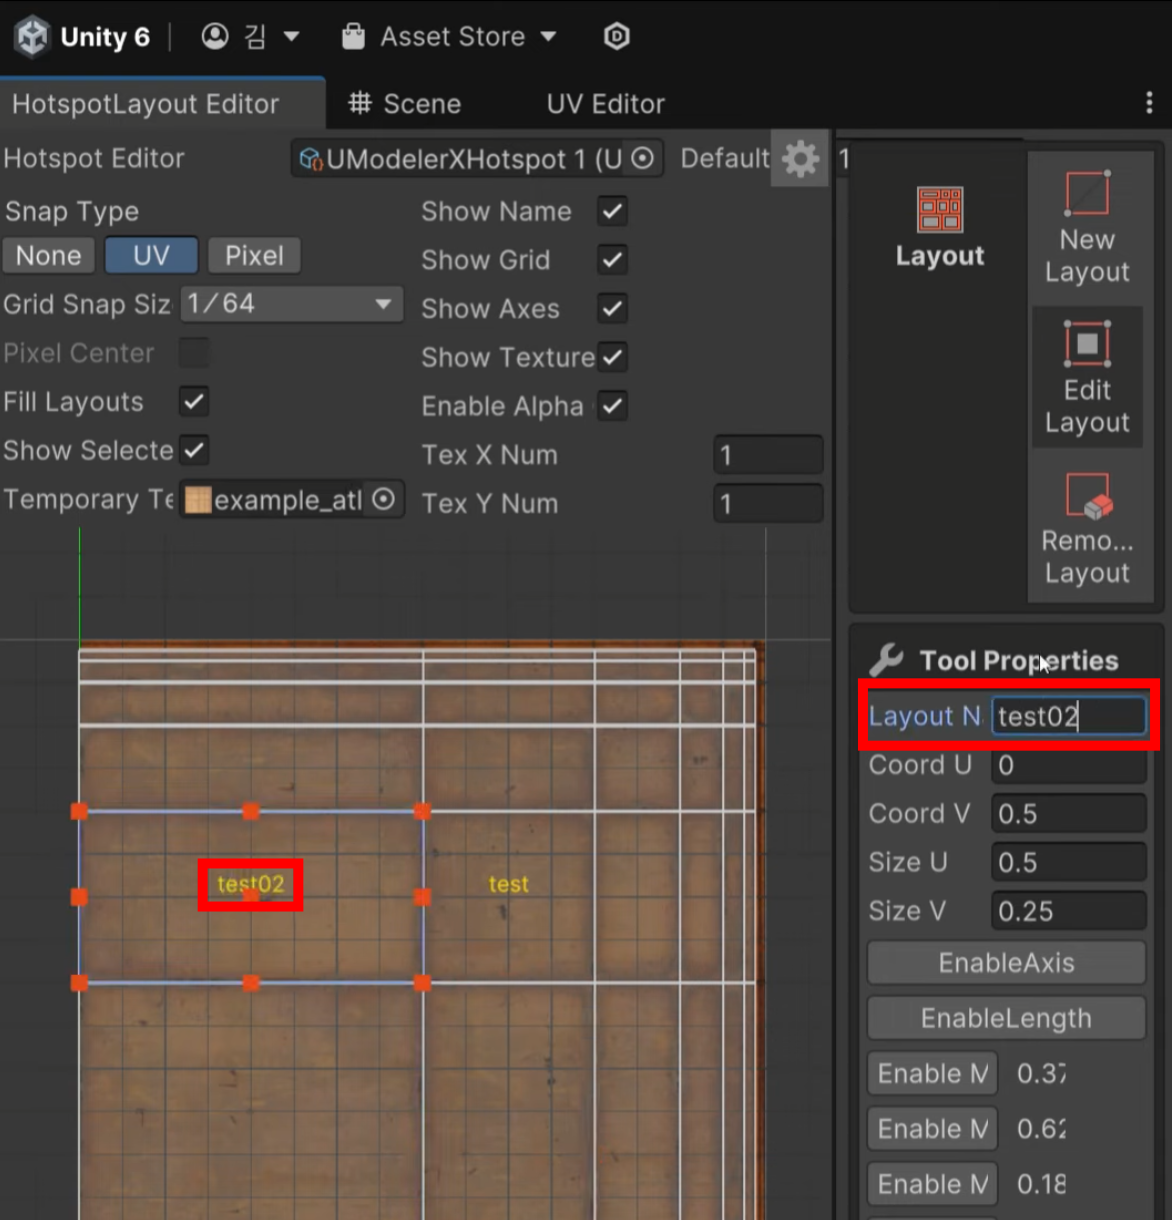
2.Click Selected Layout and choose your layout.
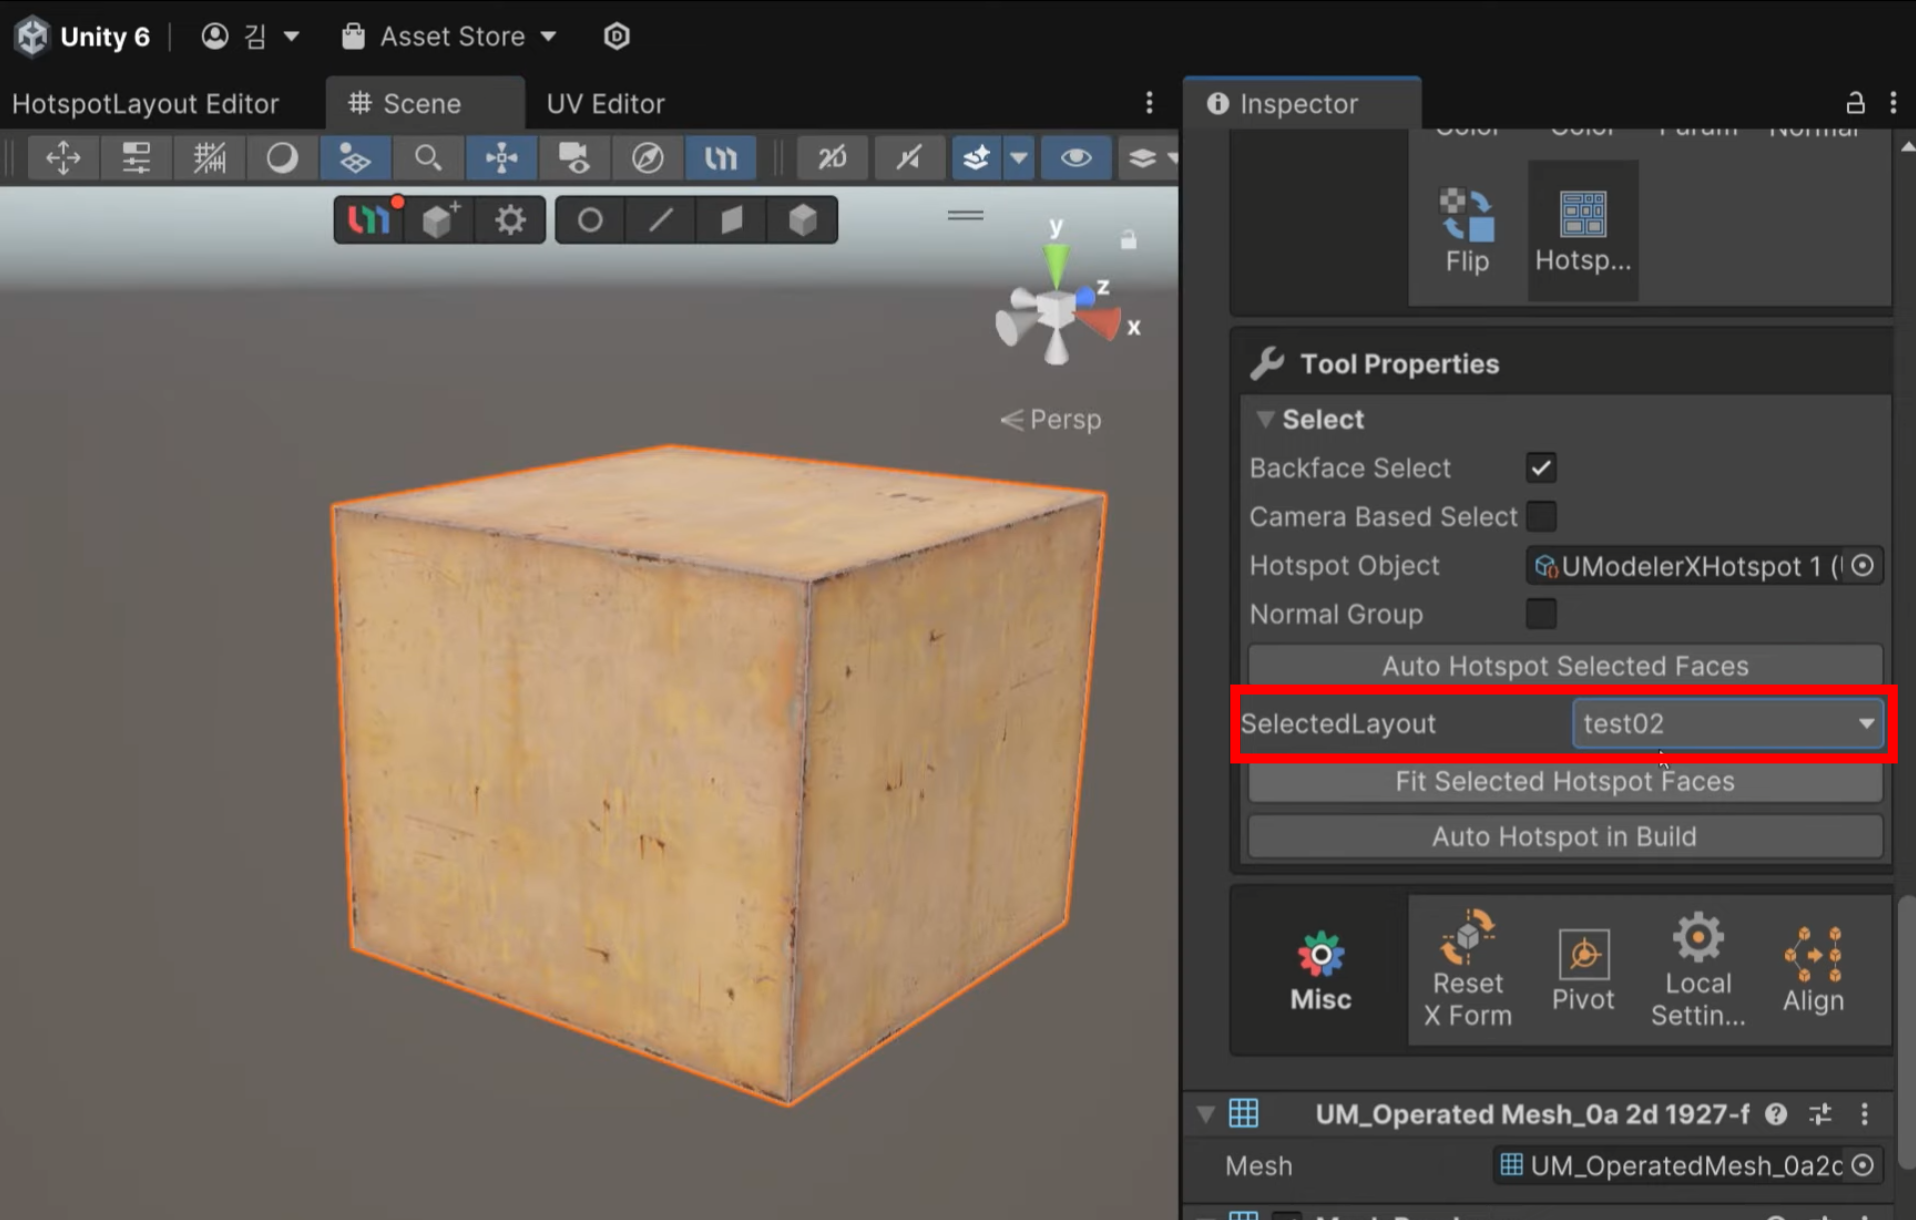
3.Click Fit Selected Hotspot Face to apply the texture to the selected face.